Visual Sentinel
Automated Visual Regression Detection enables seamless identification of visual discrepancies—such as font size, color shifts, padding issues, and broken images—across user interfaces following any source code changes. By continuously monitoring and comparing UI states, this feature ensures consistent design integrity and eliminates potential negative impacts on user experience. With AI-enhanced precision and real-time alerts, teams can proactively detect and resolve visual regressions, significantly improving the reliability and efficiency of UI testing.
1) Location of Turning on Visual Sentinel
a) At each step within the scenario, a 'Visual Sentinel' toggle is available inside the step's settings panel.
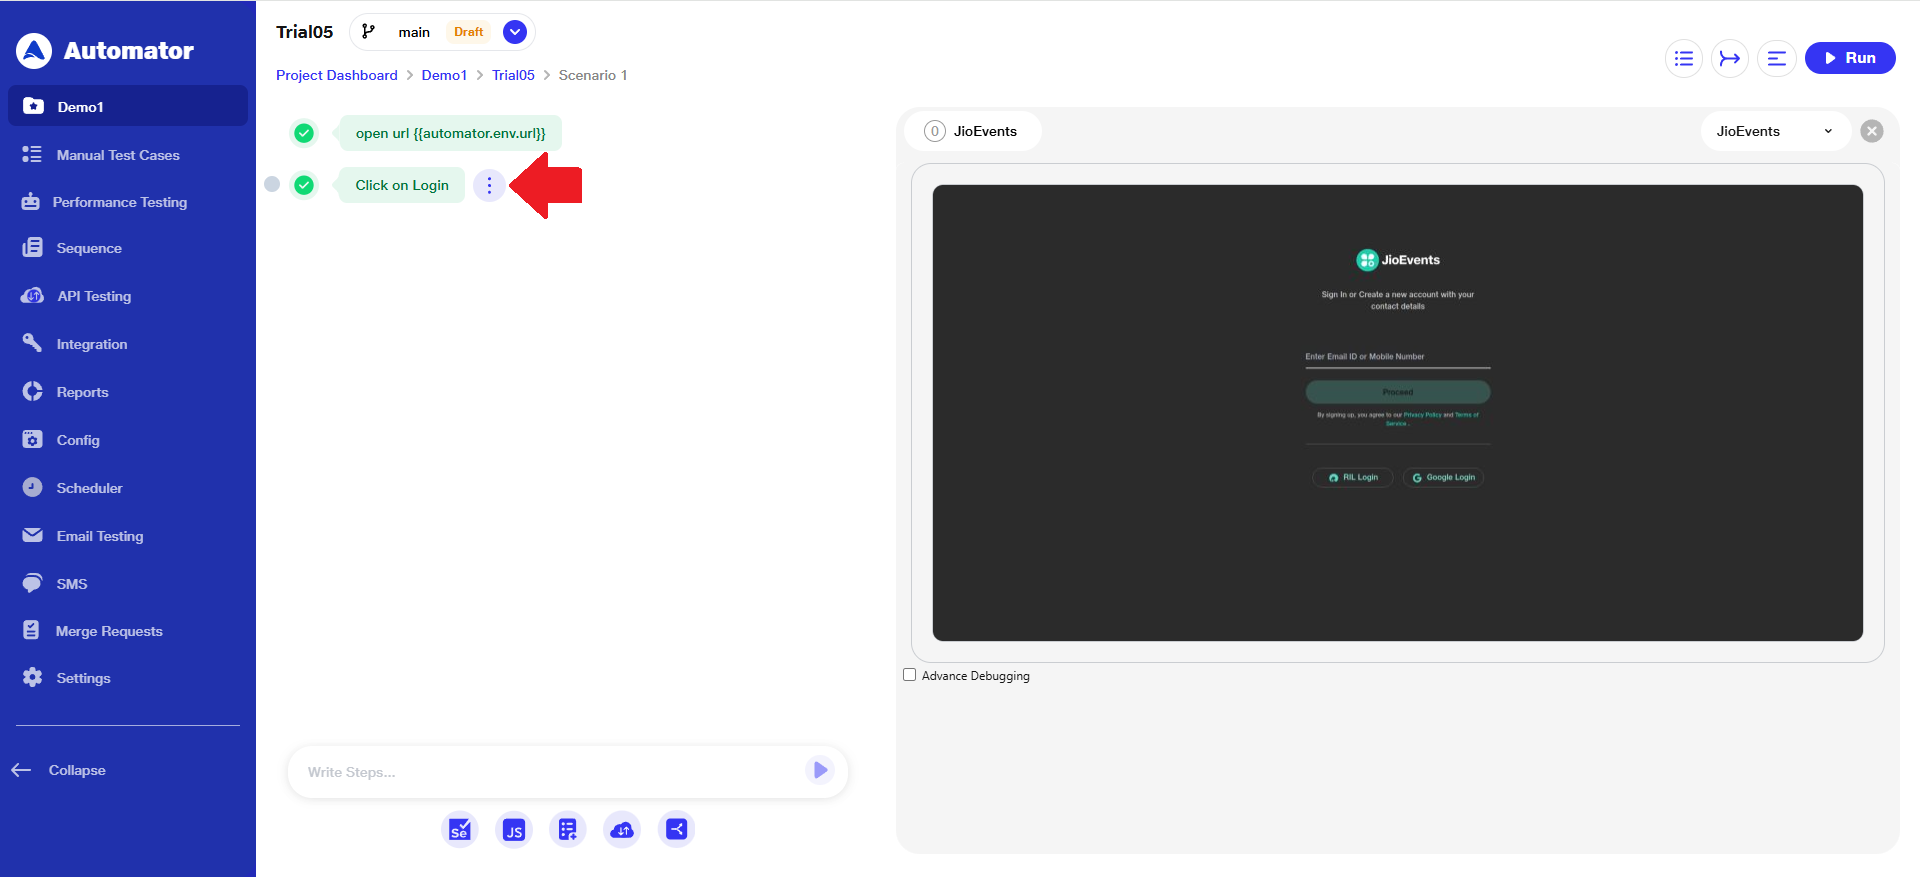
b) Hover over the step to reveal the three-dot menu.
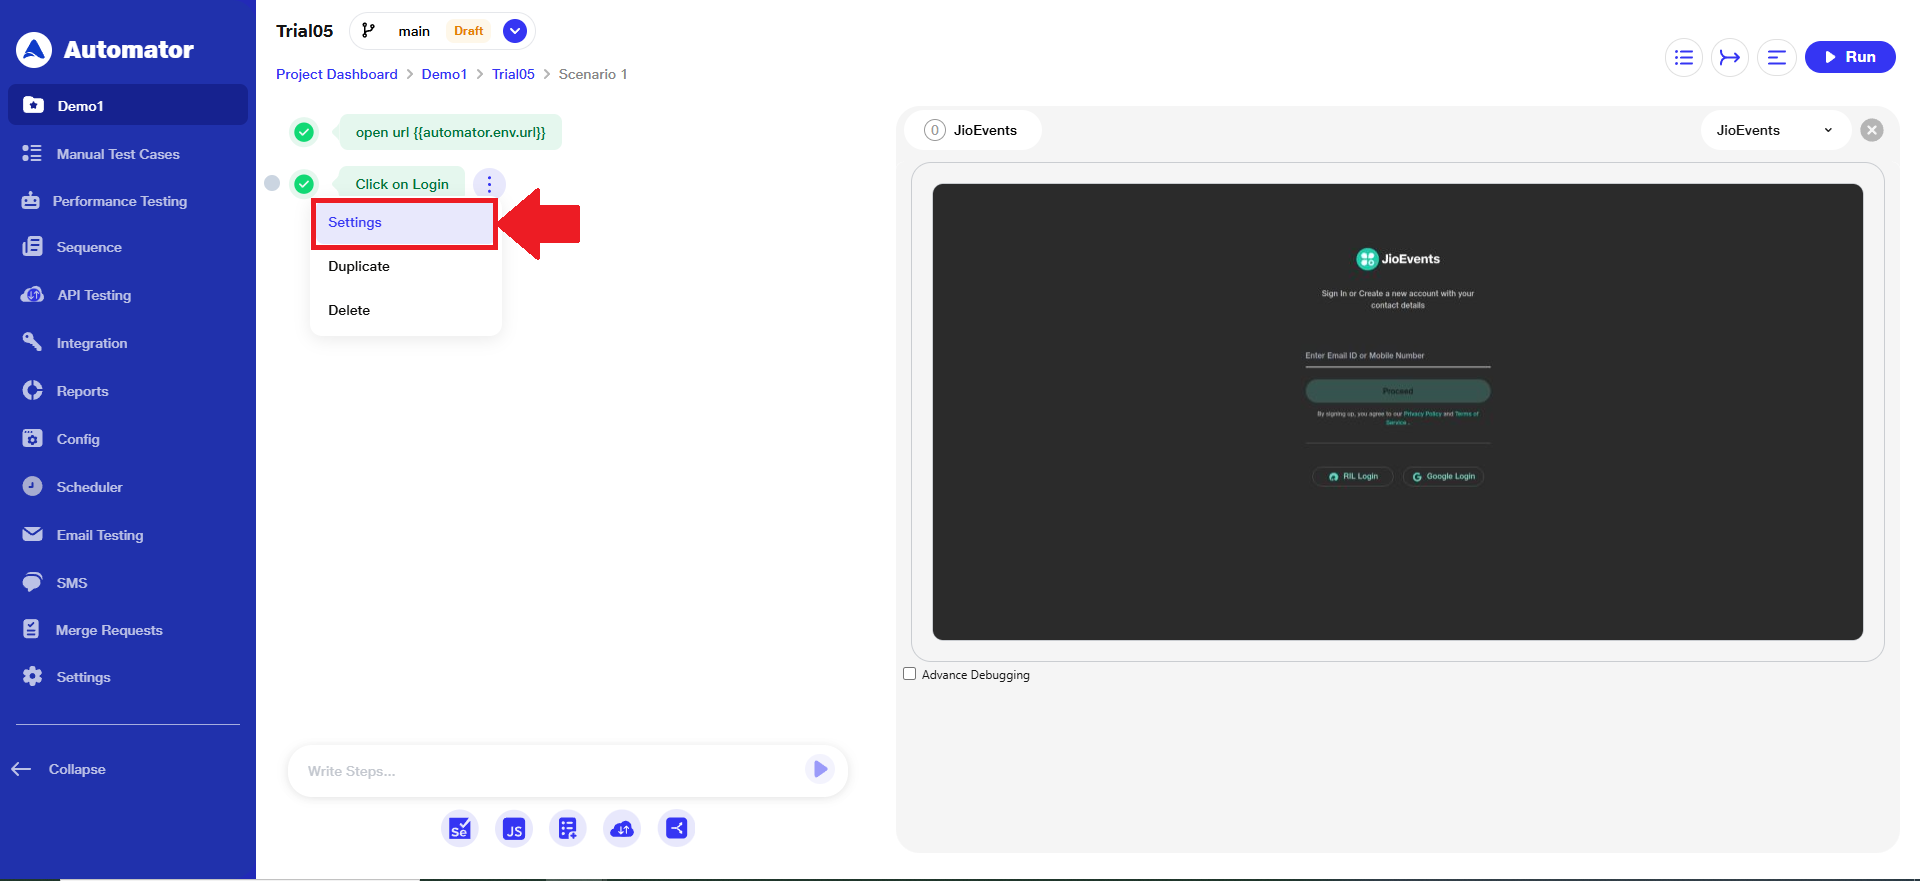
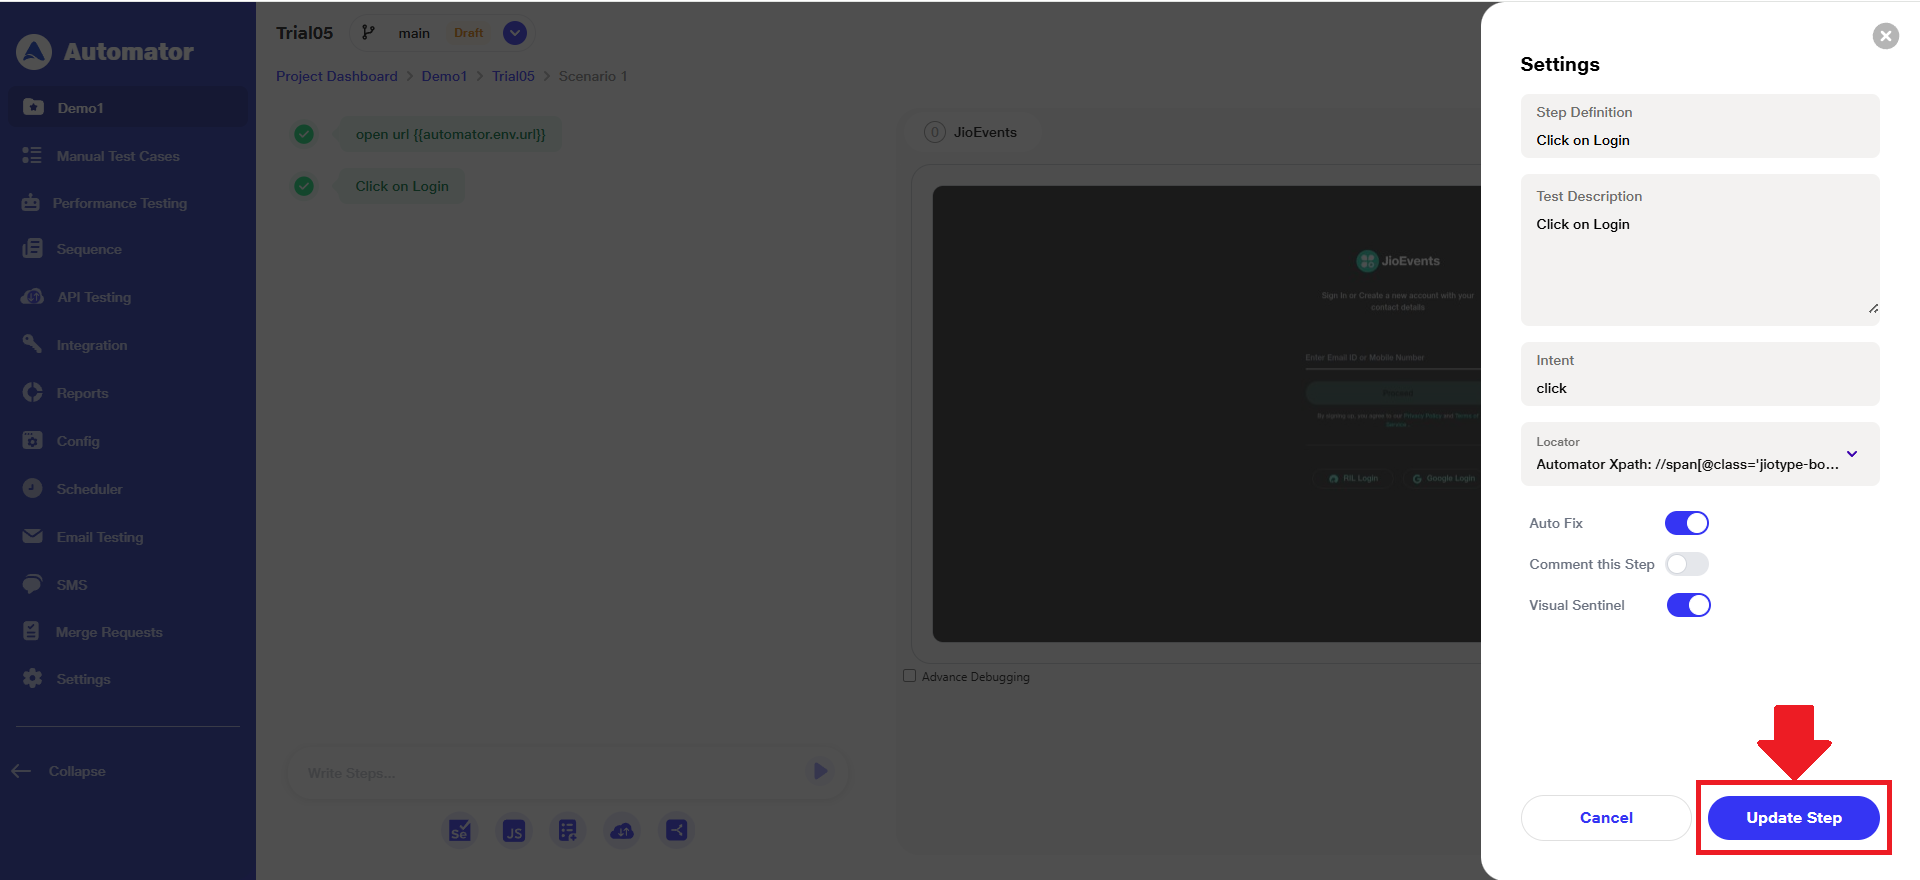
 c) Click on 'Settings' from the menu list.
 d) In the Settings panel, you'll find a 'Visual Sentinel' toggle. You can enable or disable this option to control whether visual validation is applied to this specific step.
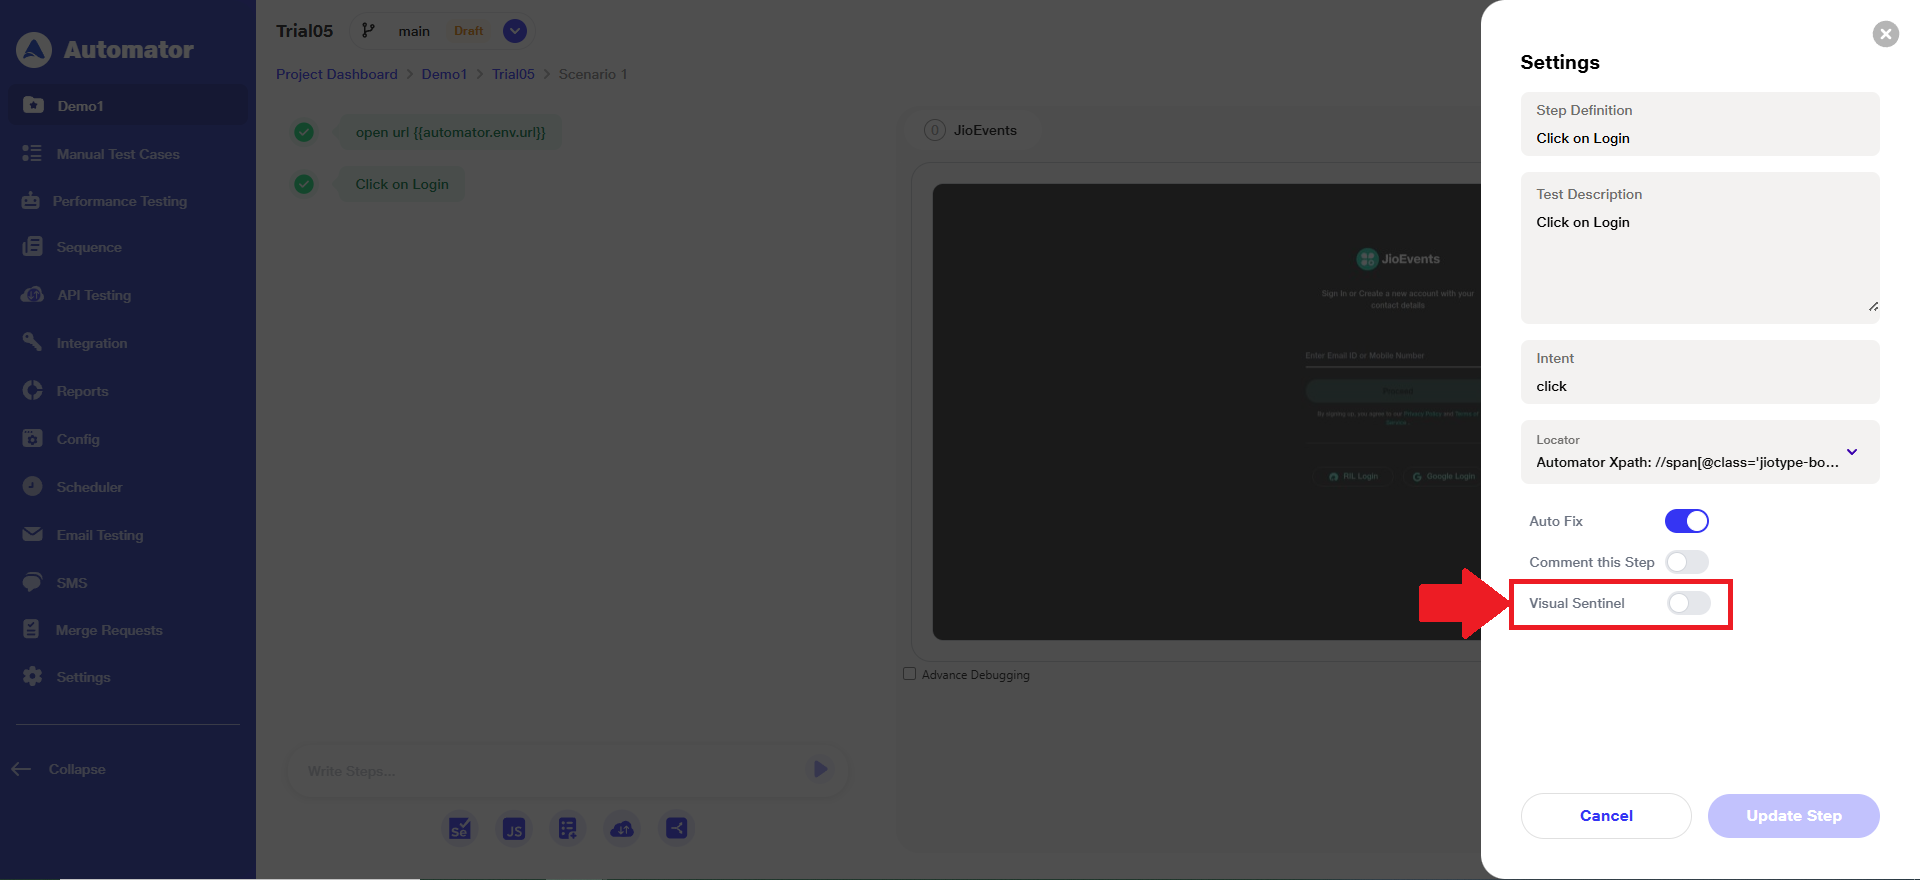 e) By default, the 'Visual Sentinel' toggle is OFF.
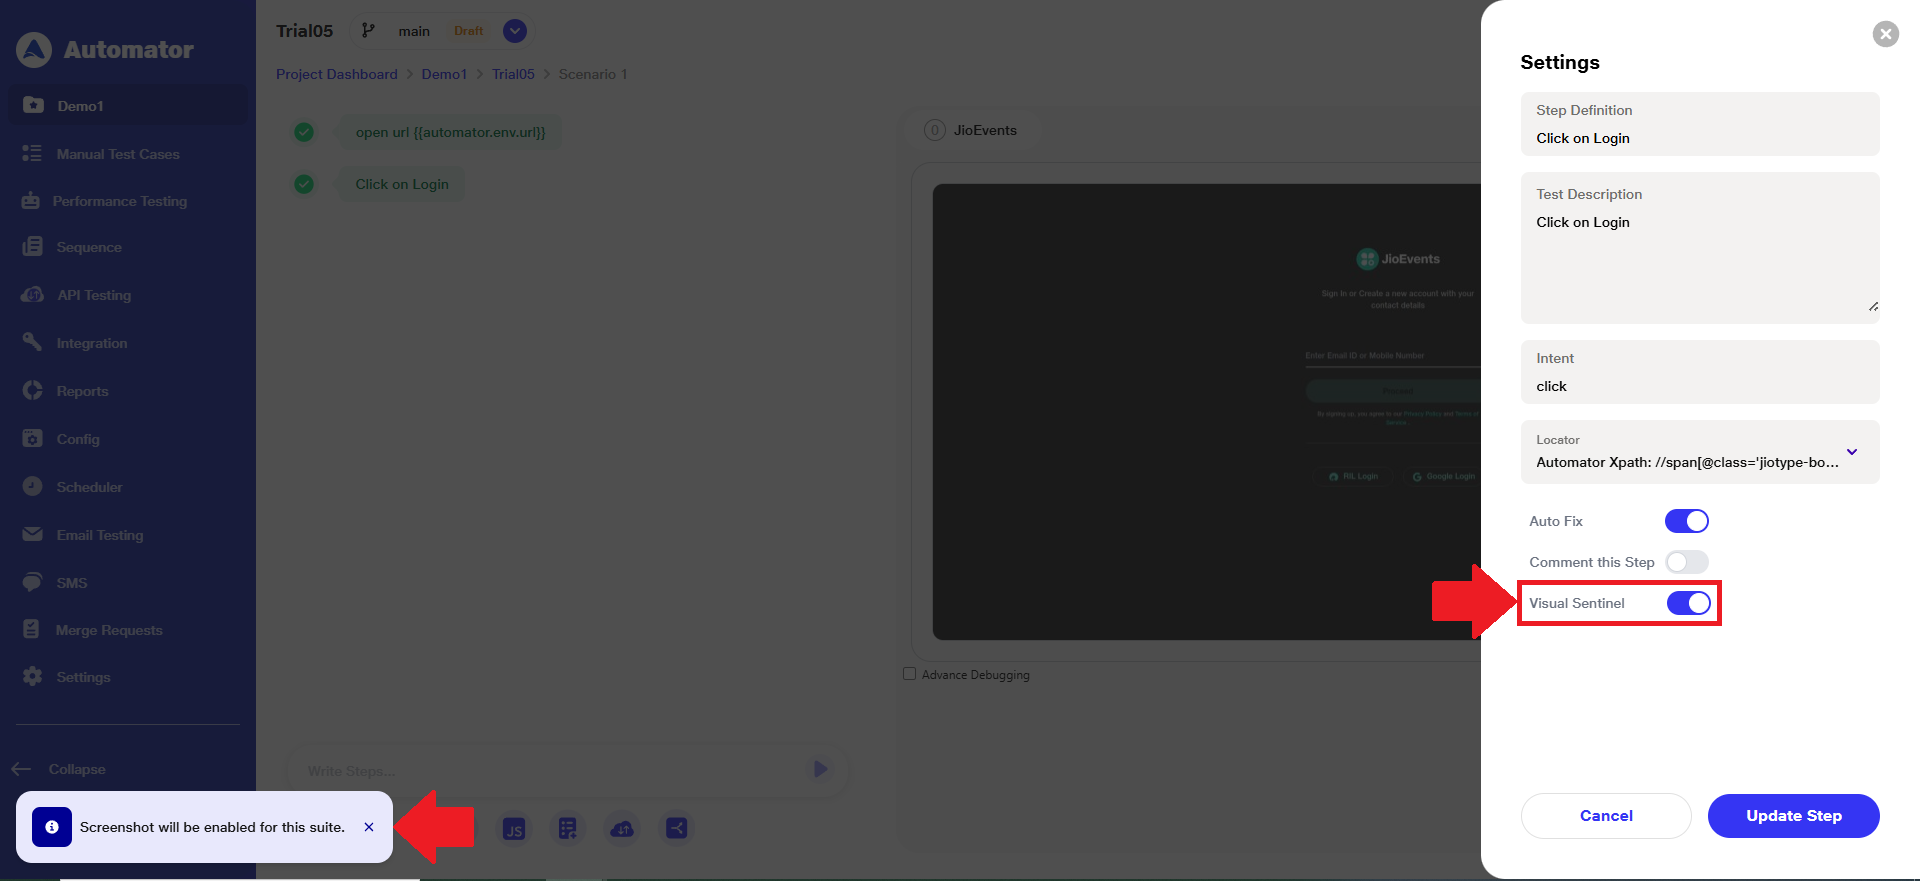
f) When you enable it, the 'Capture Screenshot' option is automatically turned ON, as screenshots are required for visual comparison.
g) A notification will appear stating: "Screenshot will be enabled for this suite."
h) Once 'Visual Sentinel' is ON at the step level, during the next run, the step images will be automatically captured and become the 'Baseline Images'.
 i) Please Note: If 'Visual Sentinel' is ON, the 'Capture Screenshot' toggle from the suite settings cannot be turned OFF.
j) Click the 'Update' button to save and apply the changes made to the 'Visual Sentinel' setting.
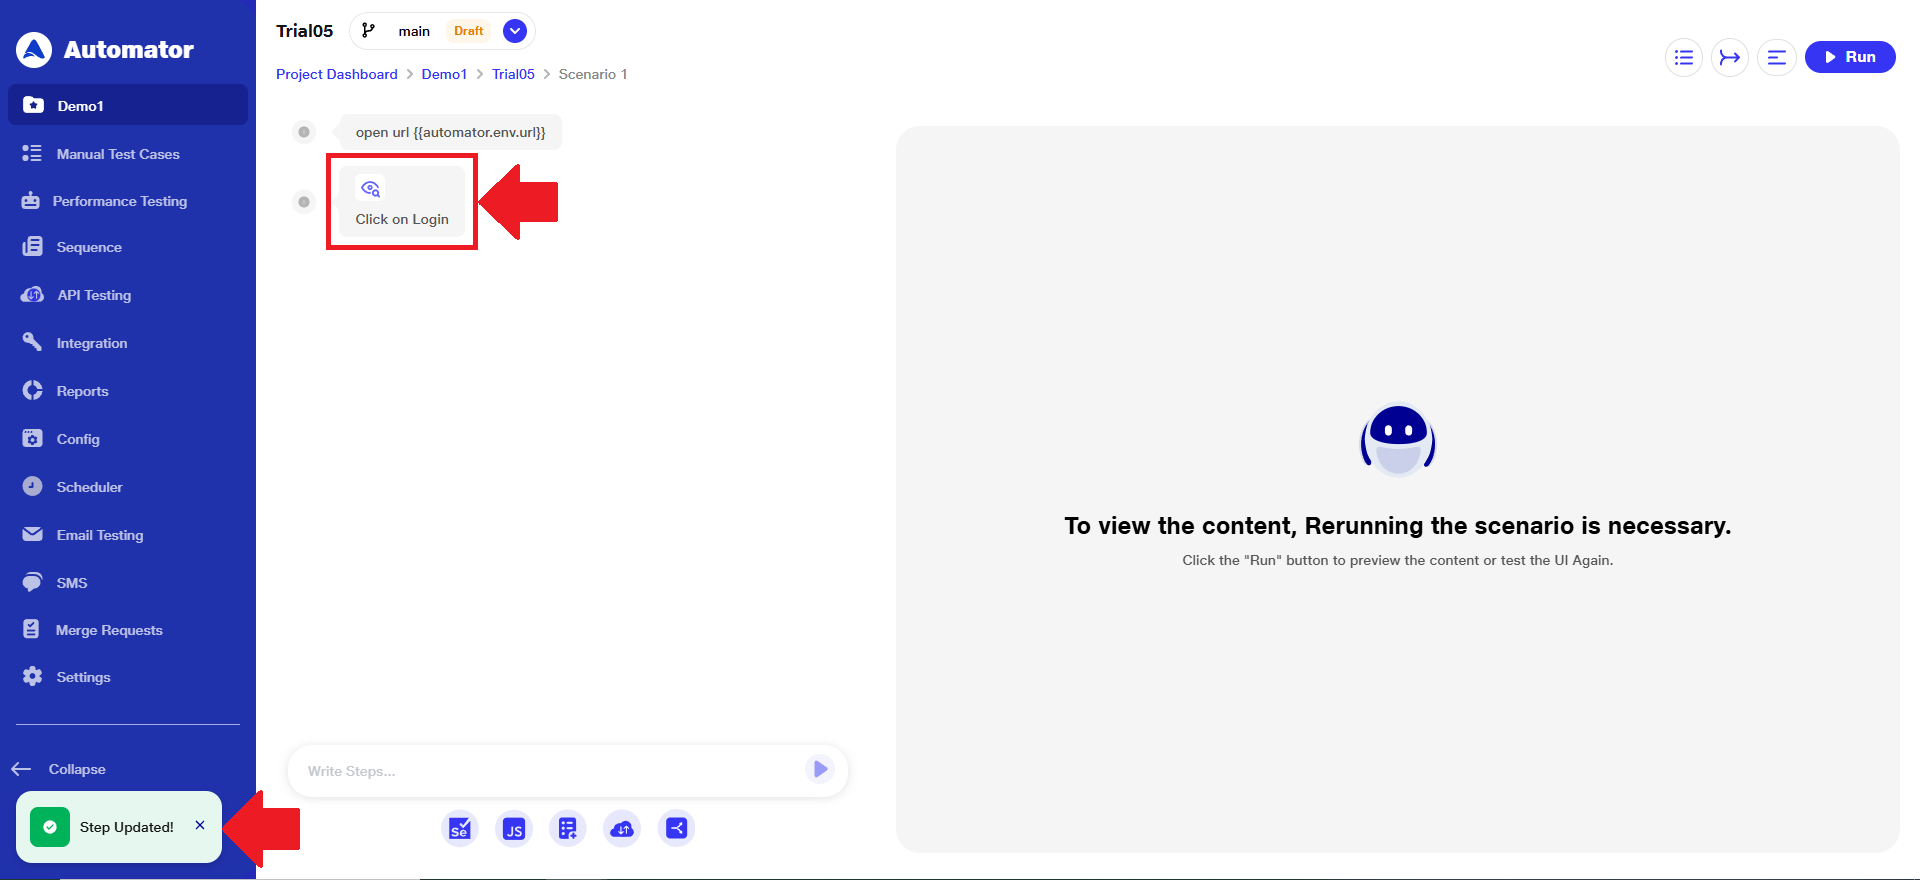
 k) A 'Step Updated!' popup will appear confirming the changes.
l) Steps with 'Visual Sentinel' enabled will display a distinct icon to differentiate them from normal steps.
 m) Newly added steps will not show the Visual Sentinel icon by default. The icon will appear only after the user enables the 'Visual Sentinel' toggle from the step's settings.

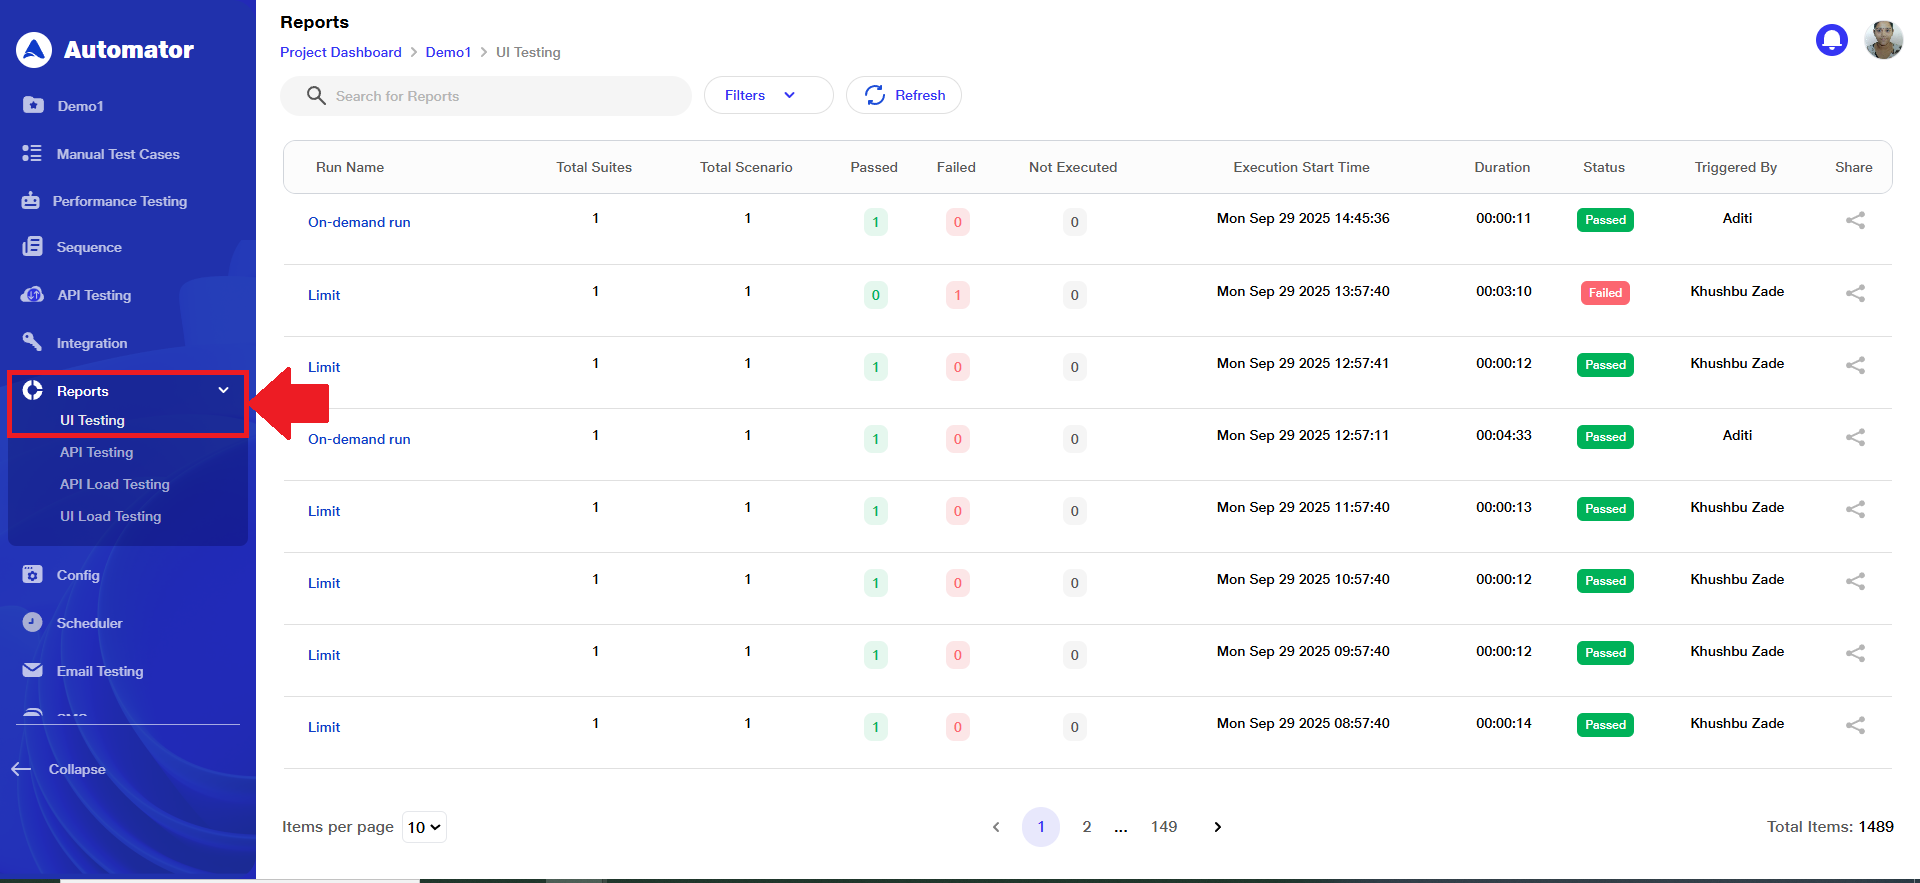
2) Identifying Visual Sentinel Changes in Reports
a) Navigate to Reports > UI Testing from the main menu.
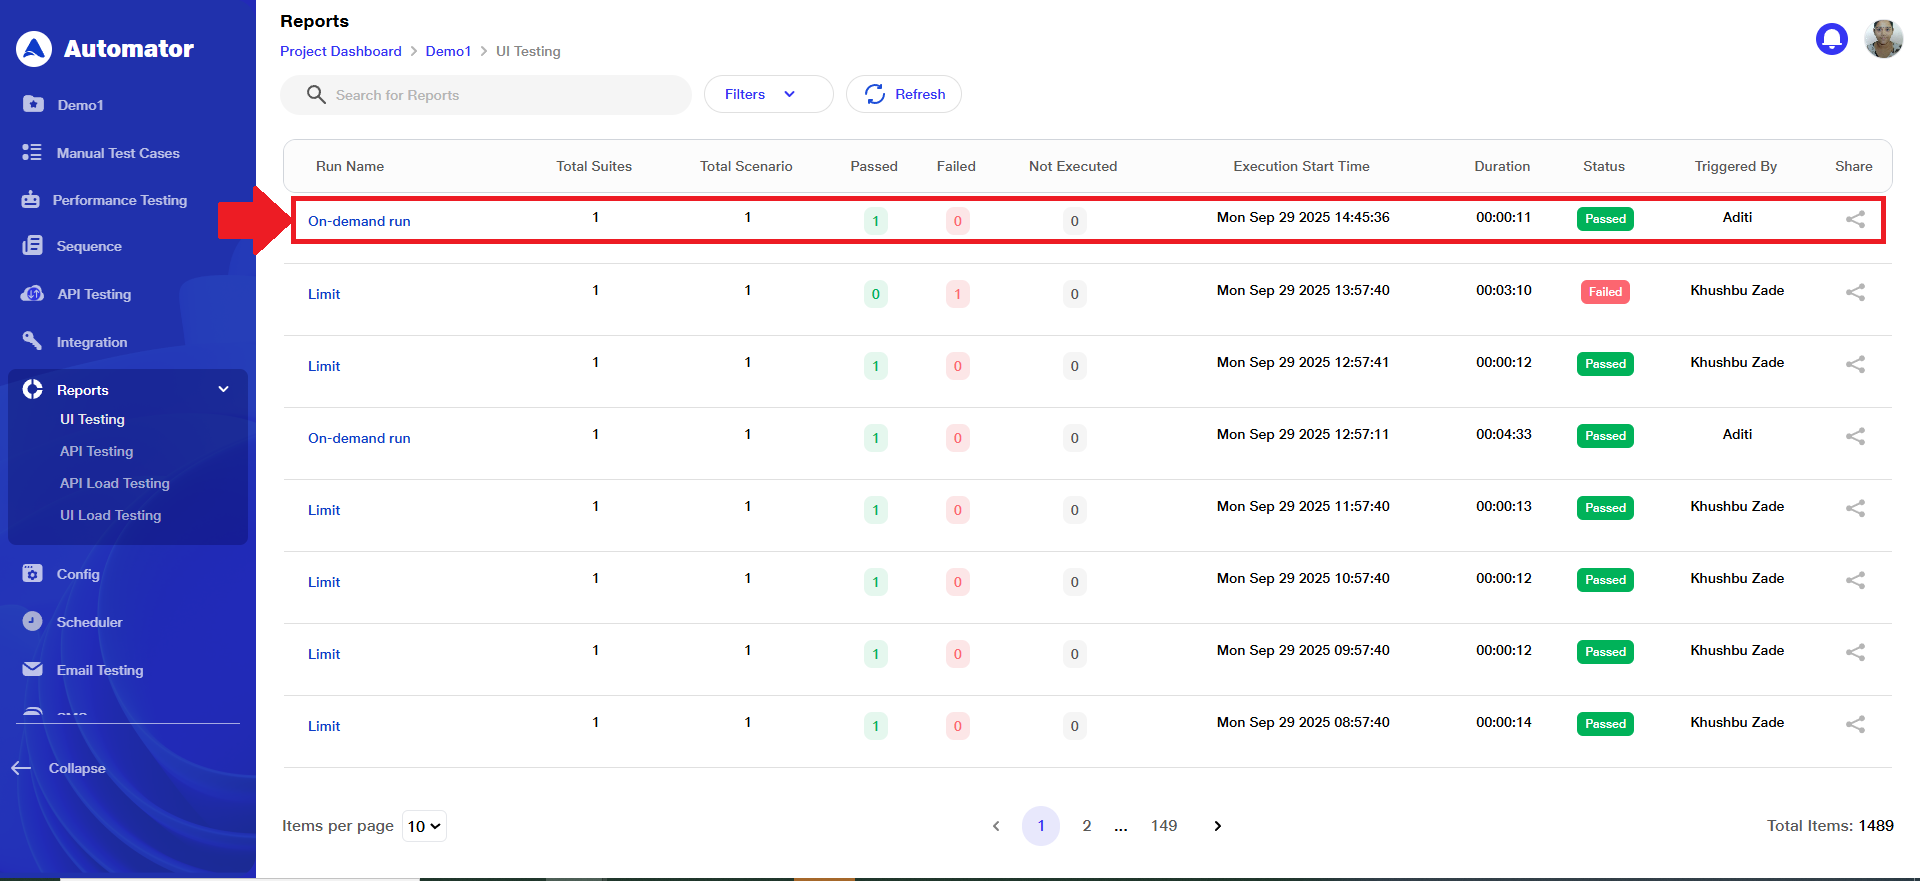
 b) Open the respective run entry.
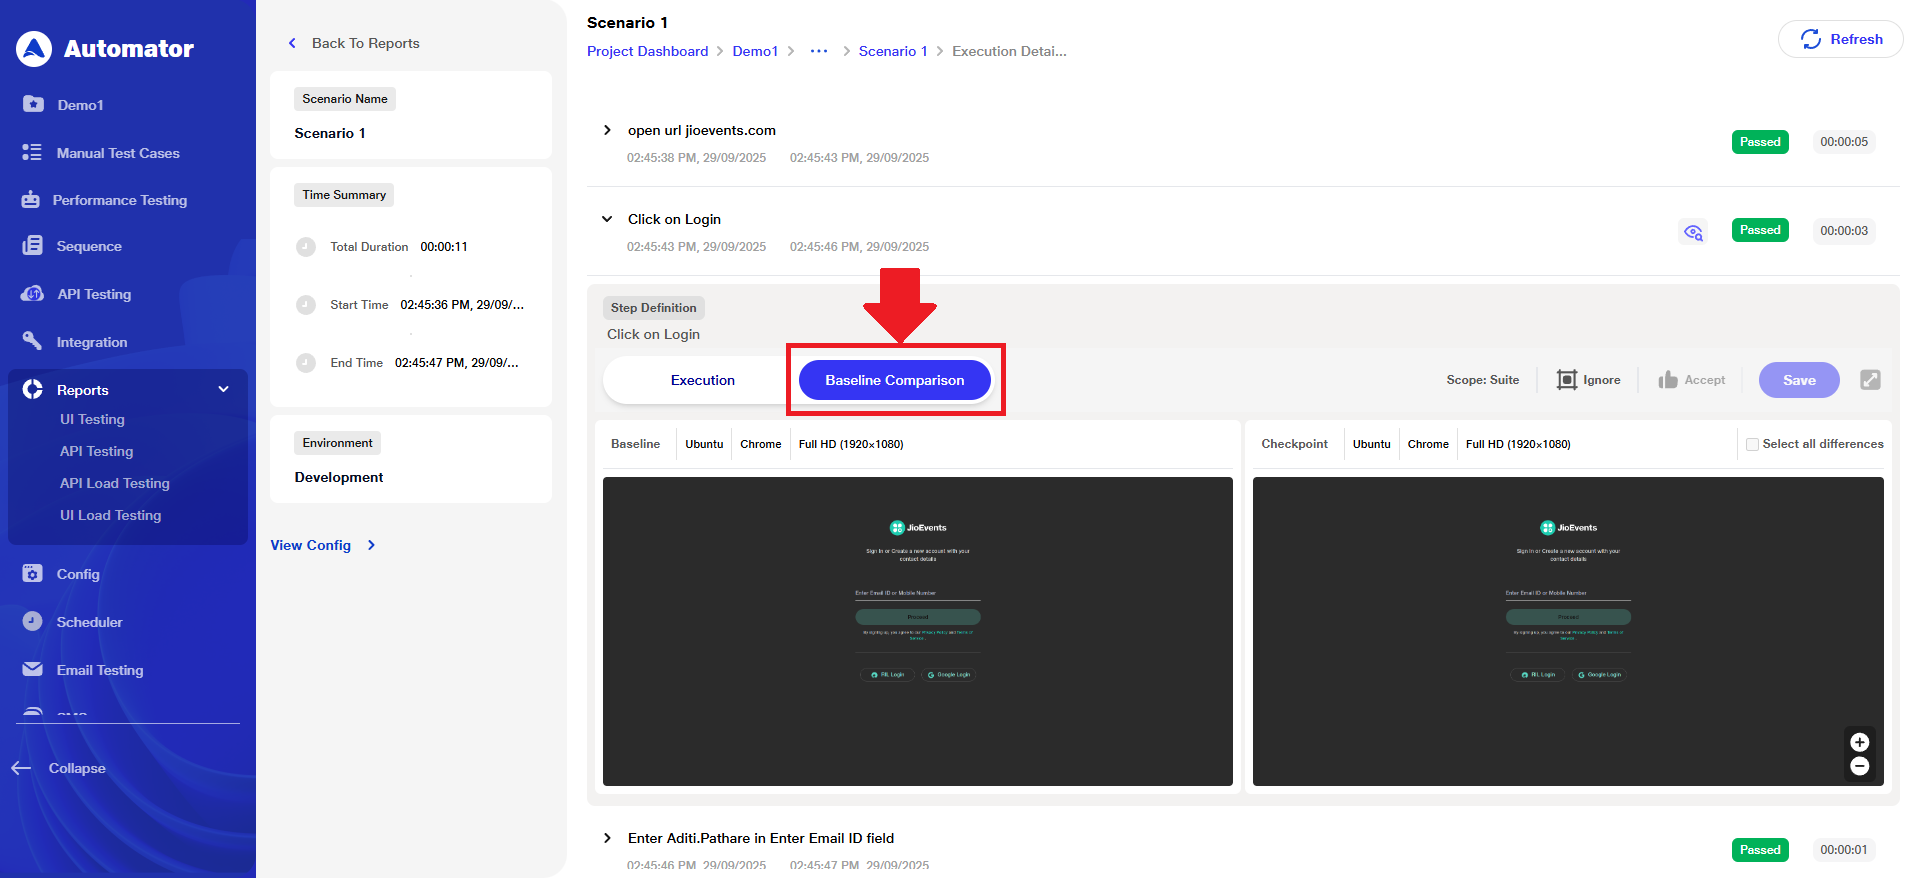
 c) Click on Baseline Comparison.
 d) Once baseline images have been generated for test steps, any modification to the Step Definition, Input Value, or Locator—combined with Visual Validation being enabled—will trigger an automatic update of the baseline image upon test execution. After the test runs:
i) An info icon will appear next to the updated step.
ii) Hovering over the icon will display the reason for the baseline image update.
iii) This behavior ensures visual validations remain accurate and aligned with intentional changes made to the test steps.
e) When new code is deployed and tests are executed with the Visual Validation option enabled:
i) Steps with Visual Validation turned ON will have their current UI images compared against their respective baseline images.
ii)Users can view detailed comparisons in the reports section under Reports > UI Testing > Compare baseline.
iii)Steps with Visual Validation turned OFF will execute normally without image comparison.
f) If any visual differences are detected during execution:
g) The affected step will fail, and mismatched regions will be highlighted in red to clearly indicate differences.
h) For each mismatch, users have multiple options to handle discrepancies:
i) Thumbs Up: Accept the detected difference and update the baseline image accordingly. Once saved, the failed step will convert to a passed step. If the step is part of a sequence, changes will apply to all sequence steps.
ii) Ignore Region: Using free drag, users can select specific dynamic areas of the UI to be ignored by the AI in future runs. After saving the ignore region, the step will pass despite differences in the ignored area.
iii) Zoom In/Out Differences: Users can zoom in and out of the visual comparison screen for a closer or broader view of mismatches.
i) This comprehensive workflow ensures that visual validations remain precise, actionable, and user-friendly across test executions and code deployments.
Benefits
� a) Efficiency & Time Savings:
i) Step-level visual validation reduces unnecessary checks.
ii) Auto-baseline and auto-update features minimize manual work.
iii) Scheduler and run configuration override enable smart, context-aware execution.
iv) Accepting differences with a click saves retest effort.
b) Accuracy, Coverage & Quality:
i)Automatic image comparison ensures pixel-level accuracy.
ii)DOM/ CSS diff view helps identify exact causes of change.
iii) Raising bugs with IDs via Azure DevOps improves traceability.
c) User Experience & Accessibility:
i)Visual Sentinel icons and centralized report views improve usability.
ii) Zoom, drag-to-ignore, and region editing enhance tester control.
iii)Ignored regions are managed and visible in future reports.
d) Validation & Real-Time Feedback:
i) Failures are highlighted instantly with red markers.
ii) Info icons explain why baselines changed (e.g., input/locator updates).
iii) Differences can be reviewed and resolved immediately in the UI.