Environments
Environments Overview
Environments are configurable settings that allow you to define and manage variables for different stages of your application's lifecycle within your workflows. For example, you could have separate login credentials for a testing environment and a production environment, maintaining consistency in the application's process flow.
Creating and Managing Environments
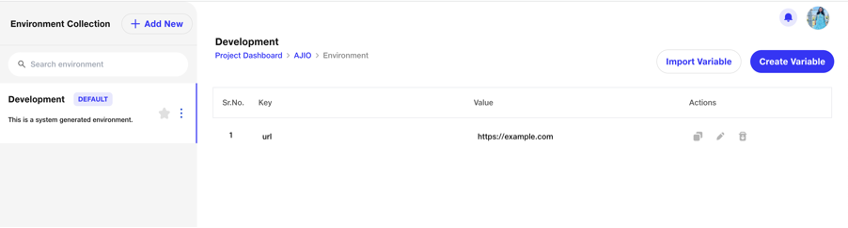
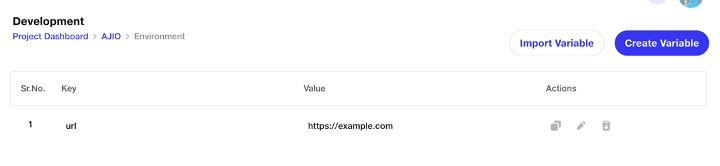
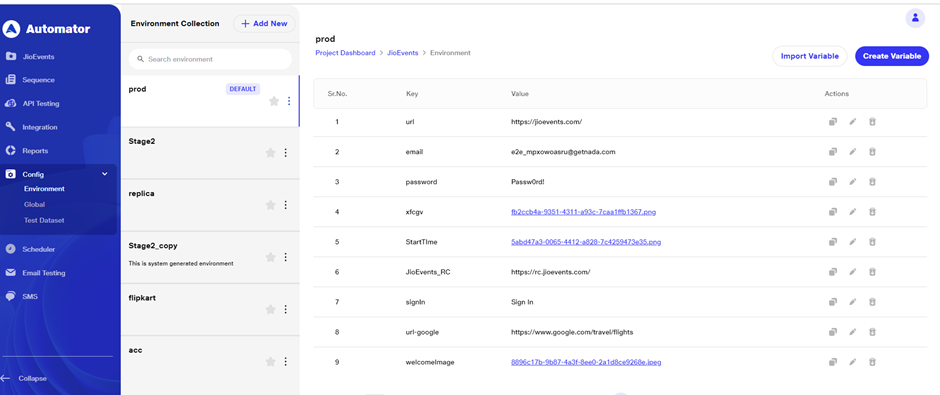
When you initiate a project, the system automatically generates a default environment i.e. Development. You can easily modify this by updating the environment variable URL to match your application's URL by editing the existing value using edit icon.

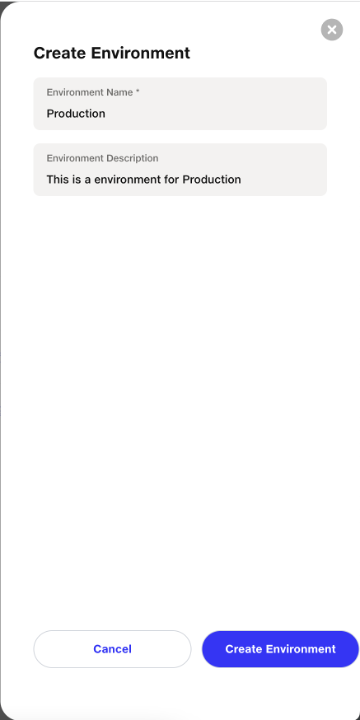
Click on Add New for creating a new Environment
Environment Name - A distinctive identifier that enables you to recognize the environment Environment Description (Optional) - Summary to help you understand the environment's intended use.
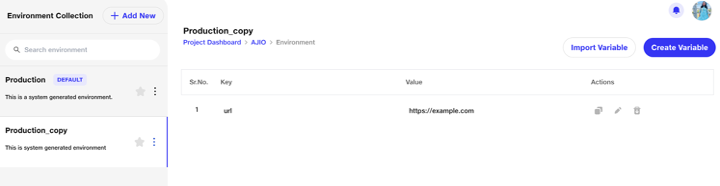
After creating the environment, you will get default environment variable URL created. You can edit the environment value accordingly.
It's possible to create additional environments or to clone existing ones for convenience. The advantage of duplication is that all variables, such as 'url' and 'userName', are copied over, but you can simply change their values as needed, rather than setting up a new environment from scratch.
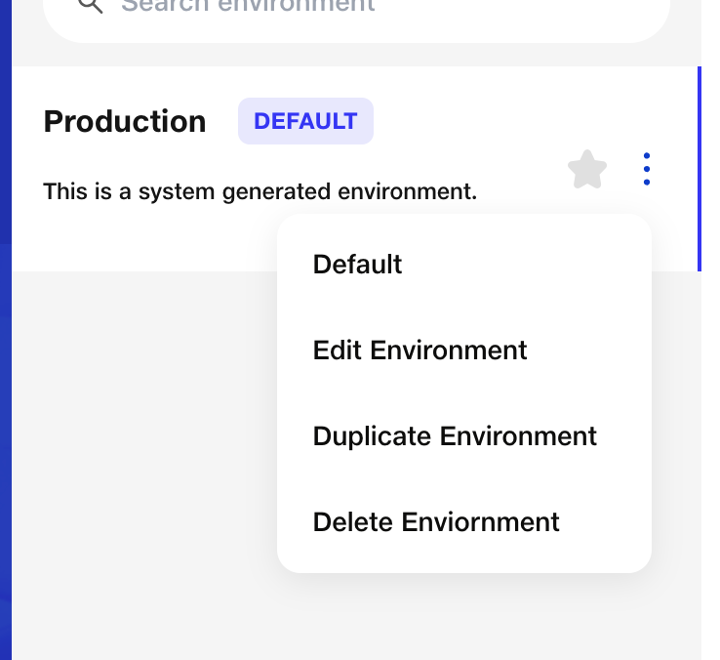
Click on Duplicate Environment for cloning the environmental variables and values
Environment Duplication and Modification
Consider you have a production environment with specific keys. By duplicating this environment— 'Production_Copy' or 'Production_Copy_Copy'— you can retain the structure of your variables and only update the values. Furthermore, you have the option to rename environments to better reflect their purpose or stage.
Variable Importation and File Support
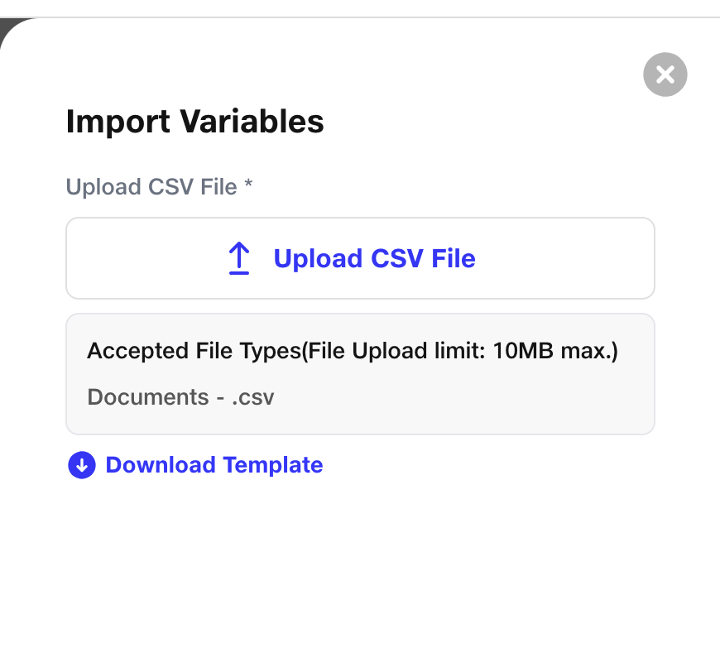
Environment variables can be imported via CSV files, accommodating both text and file types. We support a range of file types, including:
- Images: Formats such as .gif, .jpeg, .png, .bmp, .jpg, .tiff, and others are supported for image files.
- Documents: You can upload document files like .csv, .docx, .pdf, .pptx, .xlsx, .xls, and .txt.
- Video: Video files such as .mkv, .mov, .mp4, and .wmv can be stored within environments.
- Audio: Audio formats including .mp3, .wav, and others are also supported.

Running Suite with an Environment
If you've set up only one environment, that's automatically the main one I.e default for your project. But if you've got two or more, you get to decide which one takes the lead as the default setting for your project.
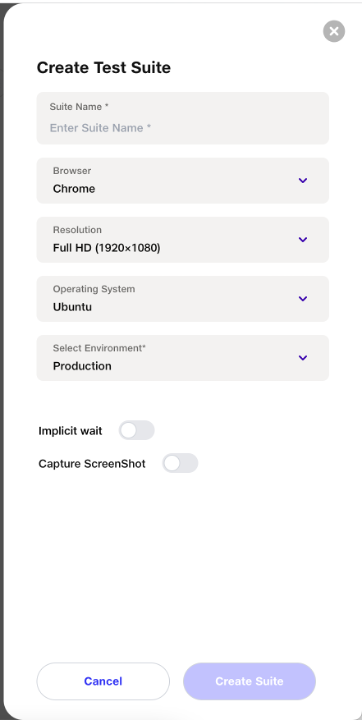
Environment, which is selected as default, would be reflecting While creating a Suite.
While Creating a Scenario, url value will be preselected.
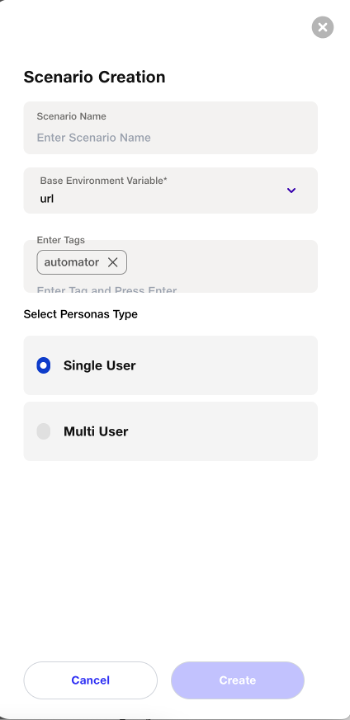
After Creating a scenario, Open url step will get automatically created for the user to open the website for testing.
Environment variables usage in your Scenarios
Environment can be called in the steps with the Syntax {{automator.env.url}} where url is a key, {{automator.env.email}} where email is a key.
We can call the file using the same syntax as below
Example -
Open url {{automator.env.url}}
Write {{automator.env.email}} in email id
Enter {{automator.env.password}} in password
Input {{automator.env.file}} in //input[@type =’file’]
After running your tests, the key would be replaced with the actual value in the reports section.
Actual test step in the scenario is open url {{automator.env.url}}, Here key is {{automator.env.url}} and value is https:://example.com

Running Scenarios with different sets of environments
You can run the same workflow in different sets of environments by just changing the environment suite level.
Edit the test suite, change the environment you want your Scenarios to run and Update the suite
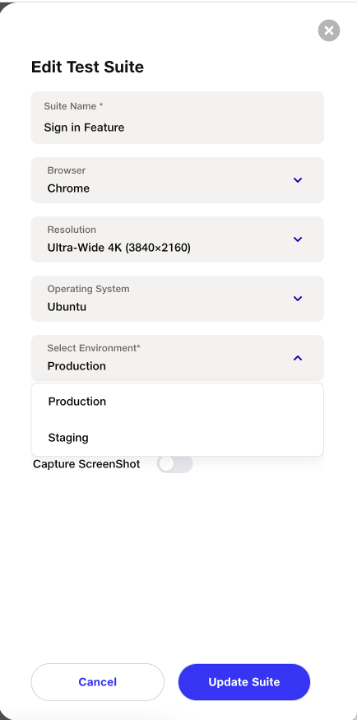
Once the suite is updated, the suite will run in the chosen environment.
Support for JSON file upload
Automator facilitates the import of JSON files, primarily for configuring environments or defining global variables.
By allowing JSON file uploads, users can effortlessly provide structured data to the application, eliminating the need for manual input of each parameter.
It enables users to define environment variables using the data provided in the uploaded JSON file. Environment variables are often used to configure applications, set system parameters, or provide runtime information.
To import variables into the environment section, users can either create a new environment or select from existing ones. This flexibility allows users to utilize variables within scenarios efficiently, whether they are newly defined or have been established in prior configurations.
Alongside environment variables, the tool also supports the definition of global variables sourced from the JSON file.
These variables are accessible across the entire automation workflow and can store essential values like authentication tokens, API keys, or parameters needed by multiple components of the automation process.
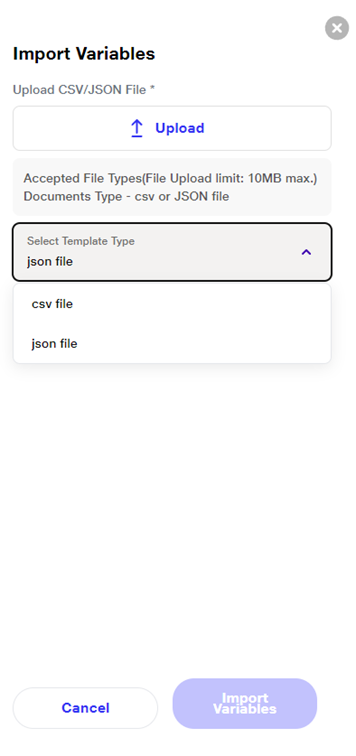
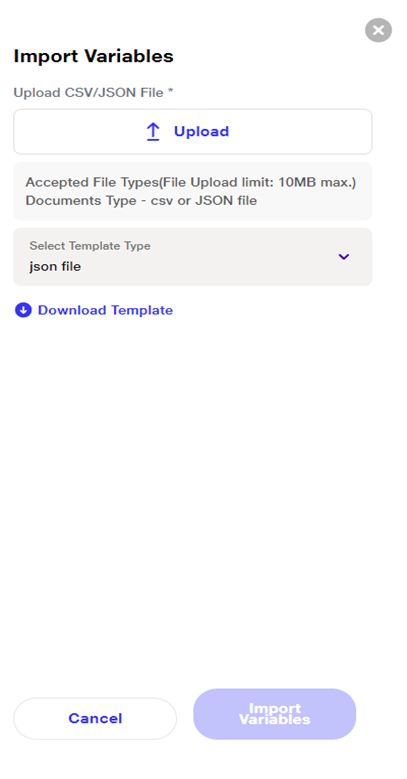
While importing environment or global variables, users encounter a dropdown labelled "Select Template Type," offering options for CSV and JSON formats. The CSV option is pre-selected by default
Users can import files with a maximum size limit of 10MB, ensuring smooth handling of variables
Once the JSON file is uploaded and parsed, users seamlessly integrate the environment and global variables into their automation workflow.
Once file is imported then variables can be called in the steps with the Syntax {{automator.env.url}} where url is a key, {{automator.env.email}} where email is a key.We can call using the same syntax as below
Example -
Open url {{automator.env.url}}
Write {{automator.env.email}} in email id
This integration empowers users to utilize configured settings consistently throughout the execution of automated tasks, thereby enhancing efficiency and maintaining uniformity in processes.
Support for JSON file upload in Automator streamlines the configuration process by enabling users to define environment and global variables using structured data. This feature significantly enhances flexibility, scalability, and security in automating various tasks and workflows.