DB Connection Setup & Testing
Empowers users to perform database-level validation across MySQL, PostgreSQL, MongoDB, and OracleDB—whether locally installed or privately hosted on the cloud—by creating structured test scenarios within Automator.AI. By enabling query execution and capturing detailed DB responses in test reports, teams can ensure accurate validation, improve debugging efficiency, and maintain consistent, reliable test outcomes across diverse database environments
1) DB Features Availability
a) Once the user requests this feature and the flag is enabled by the Automator team, the user will be able to access the DB Connections and DB Query options.
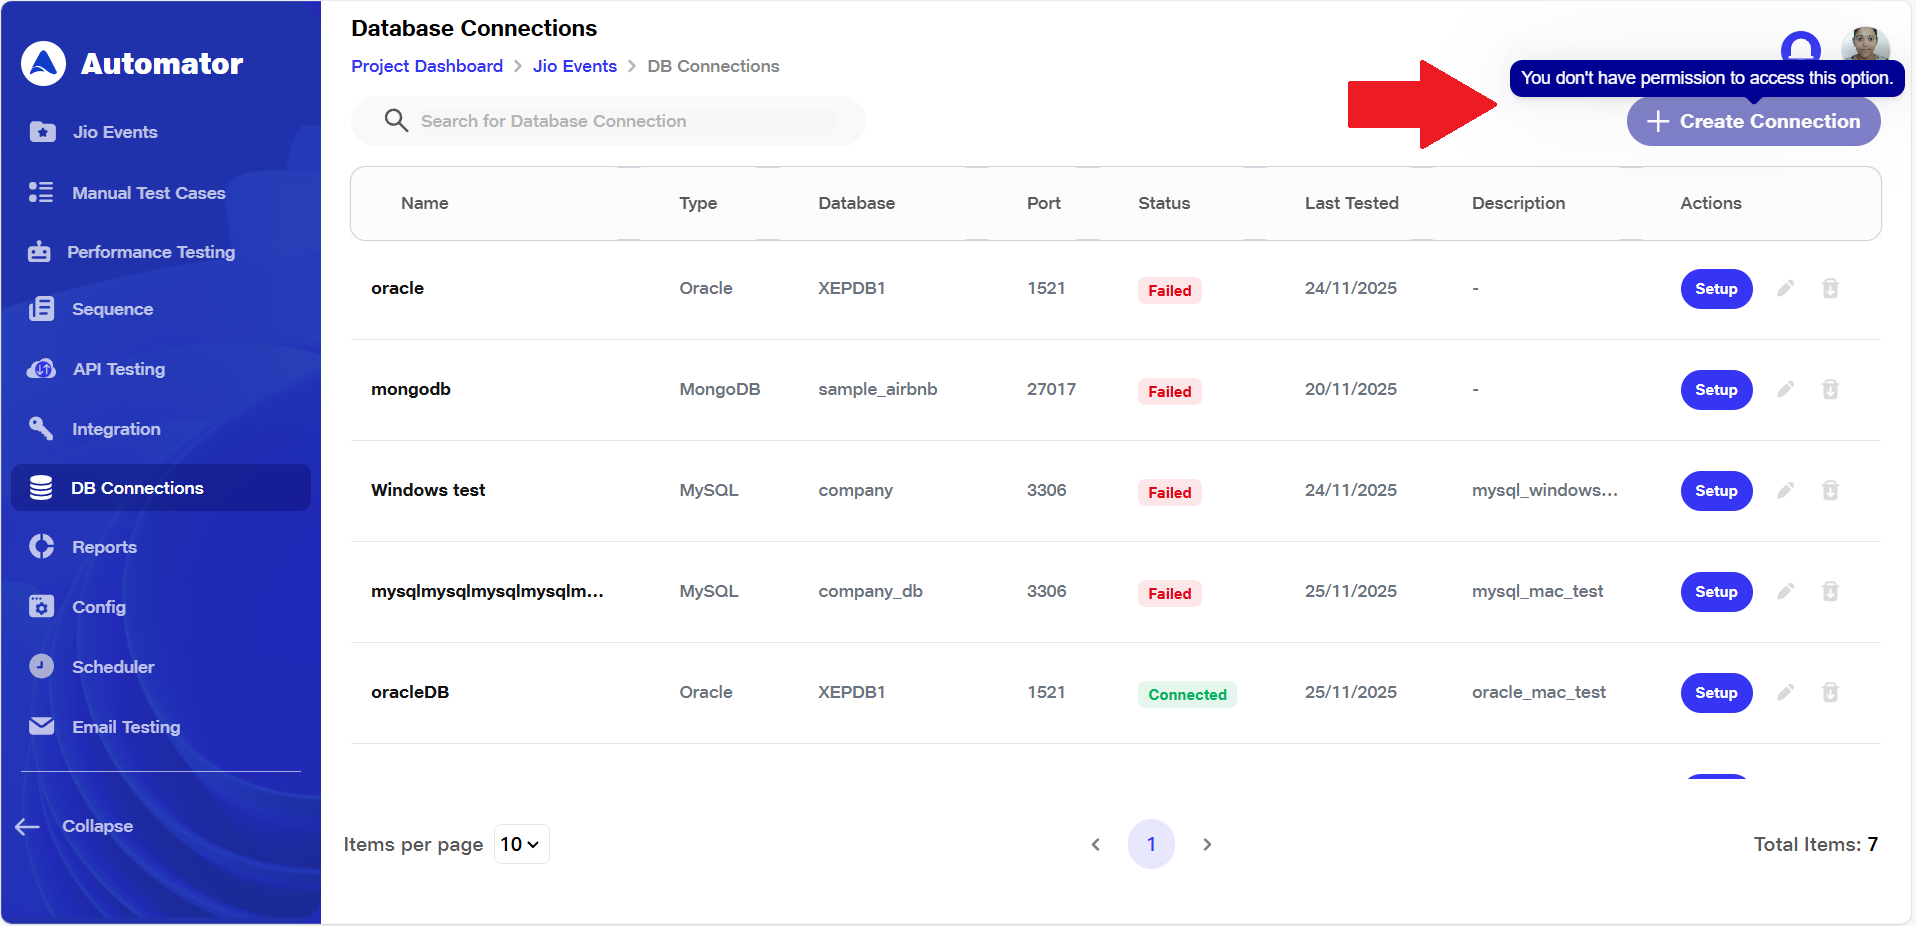
b) Only admins and project leads can create, edit, and delete connected databases.
c)All other users (Write, Read, and Reviewer roles) can only view the created databases.
d) These other users will have access only to the Setup option and the Test Connection functionality. All other options will appear in a disabled state with a tooltip stating: “You don't have permission to access this option.”
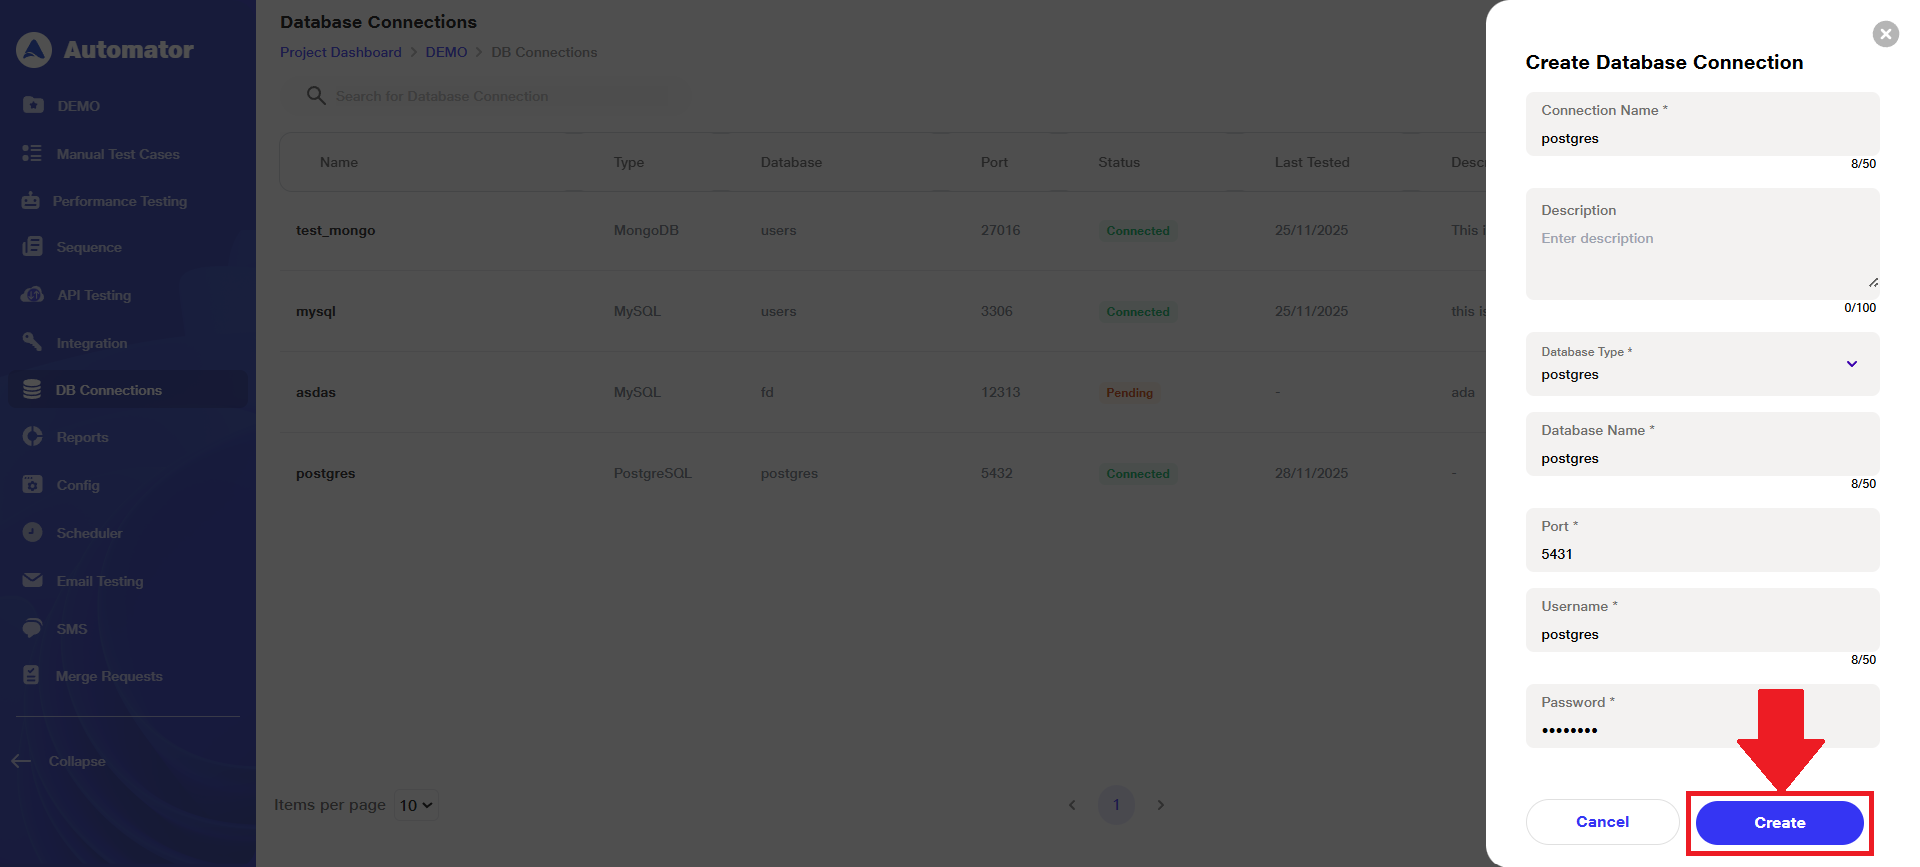
2) Locating & Creating the Database Connection
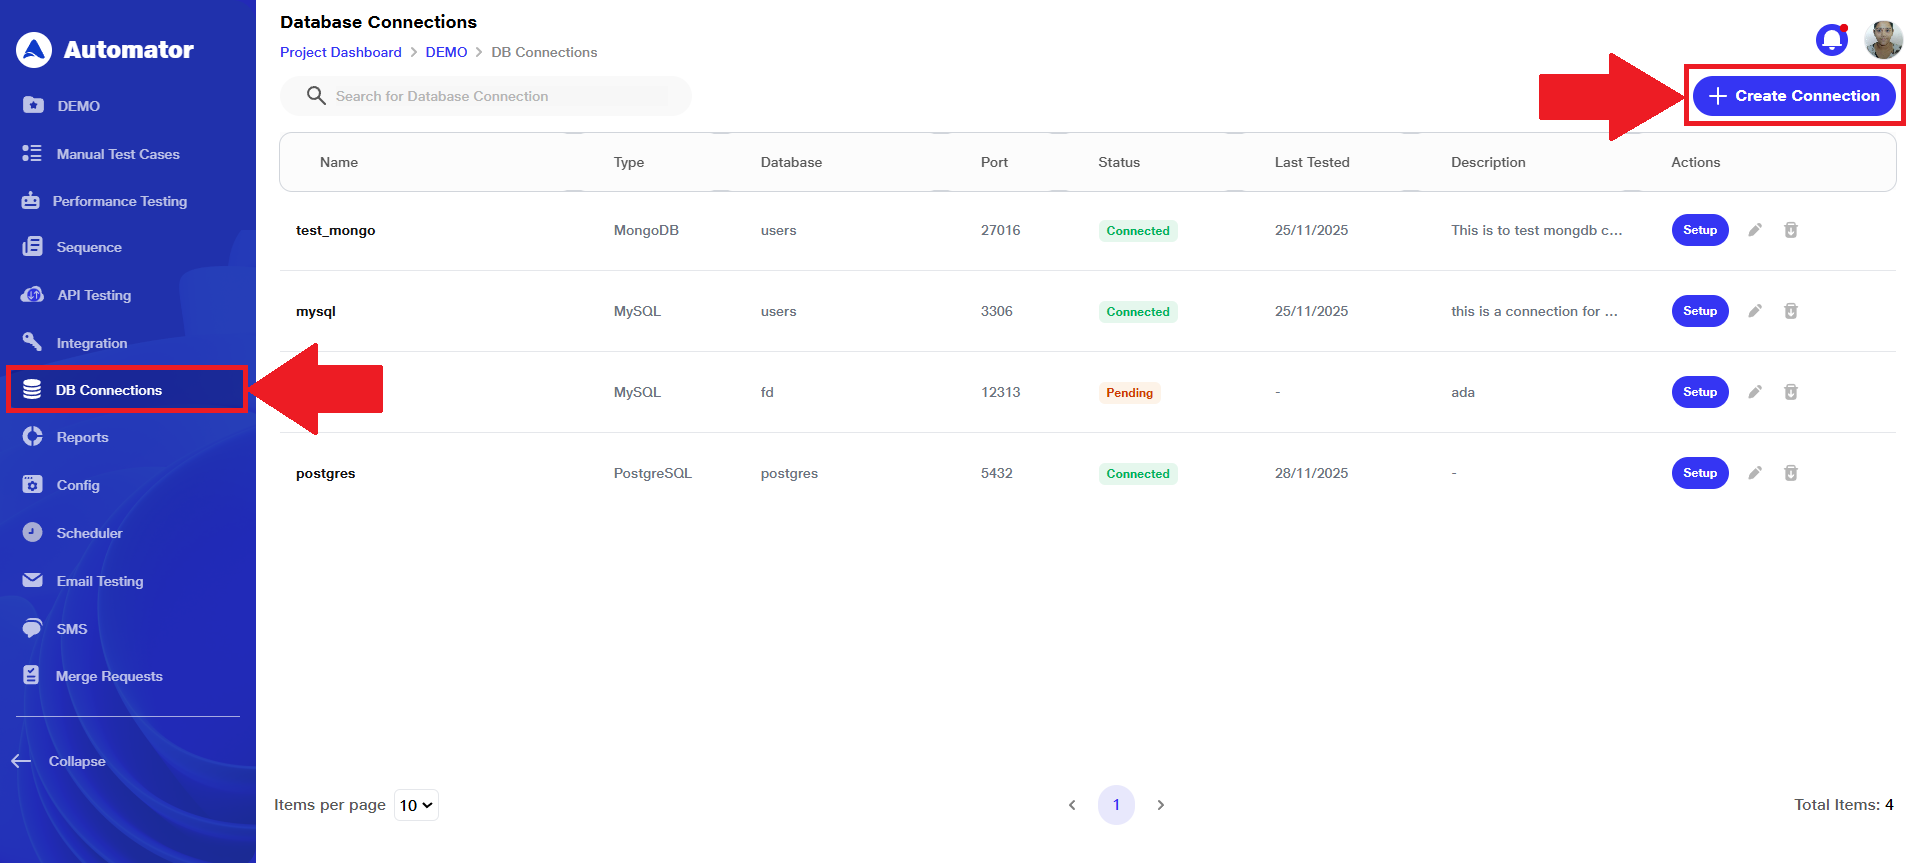
a) Navigate to the DB Connections section of the project.
b) Click the Create Connection button, typically located at the top-right corner of the screen.
 c) A Database Connection creation form will appear on the right-hand side of the screen.
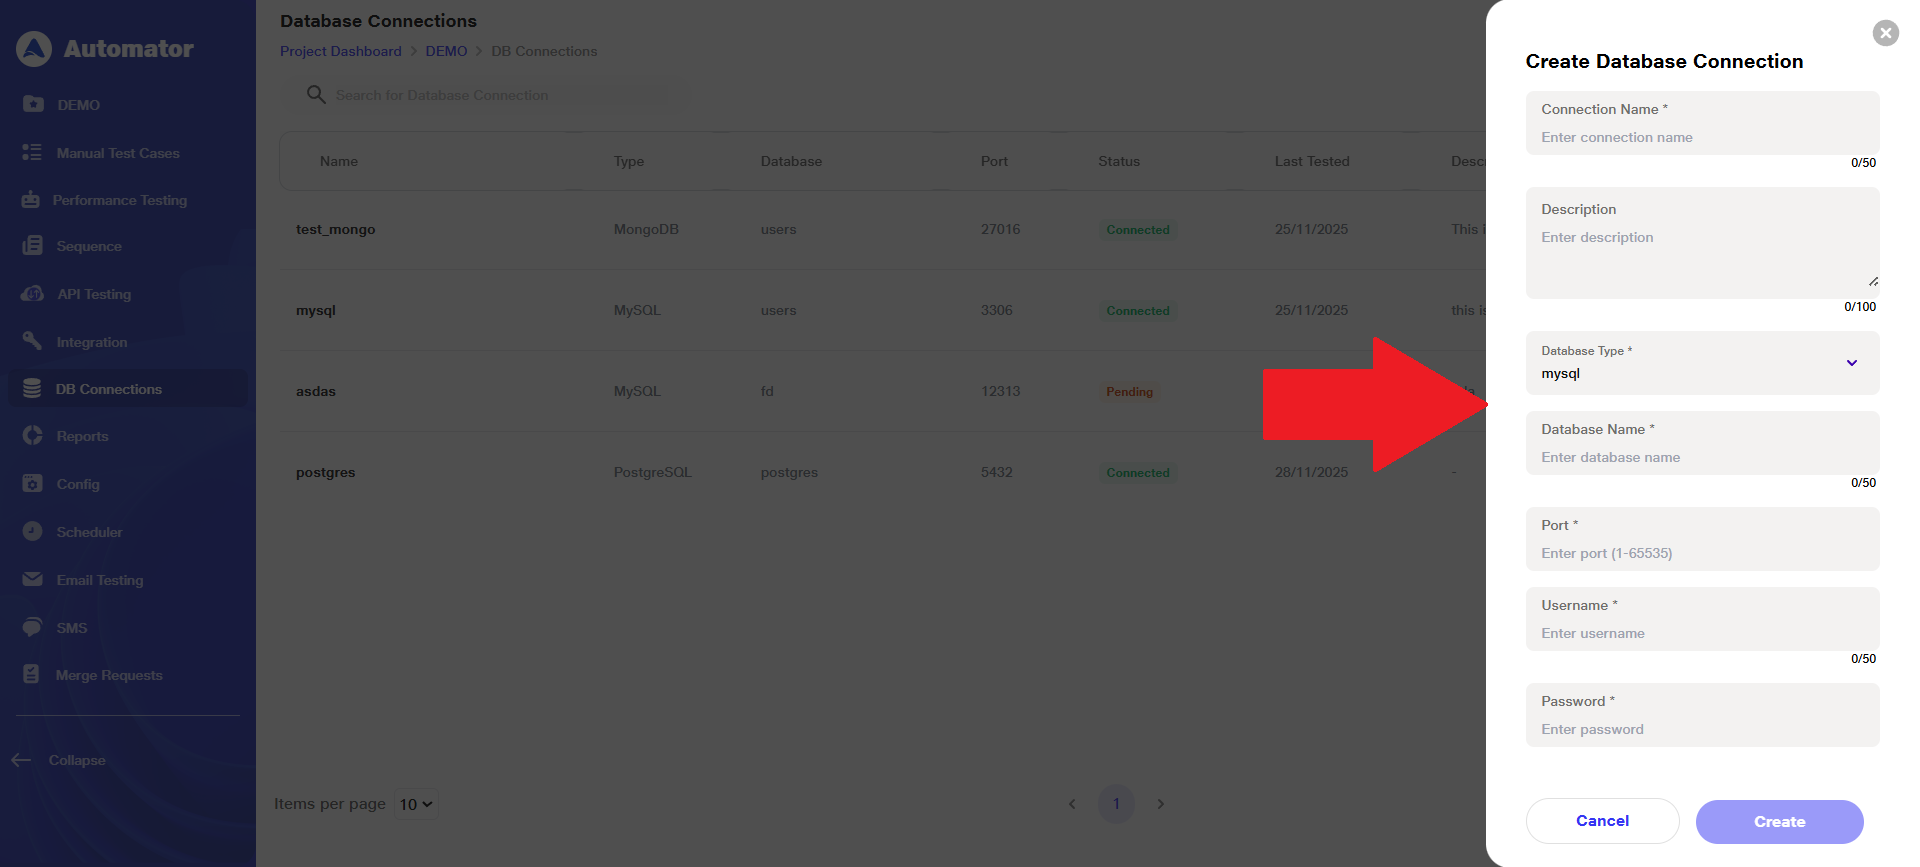 d) All the fields below are required to store the connection details in the backend, allowing the user to create a new database connection after providing all mandatory information.
i) Connection Name: Give a name to the connection using up to 50 alphanumeric characters; spaces are allowed.
ii)Description: Provide a description using up to 100 alphanumeric characters; spaces are allowed.
iii) Database Type: Select the appropriate database type from the available options: MongoDB, Oracle, MySQL, and PostgreSQL.
iv)Database Name: Enter the database name using up to 50 alphanumeric characters; spaces are allowed.
v) Port: Enter a port number using up to 5 numeric digits.
vi)Username: Enter a username using up to 50 characters; spaces are allowed.
viii) Password: Enter a password using up to 50 characters; spaces are allowed.
 Please Note: Only the Description field is optional; all other fields are mandatory.
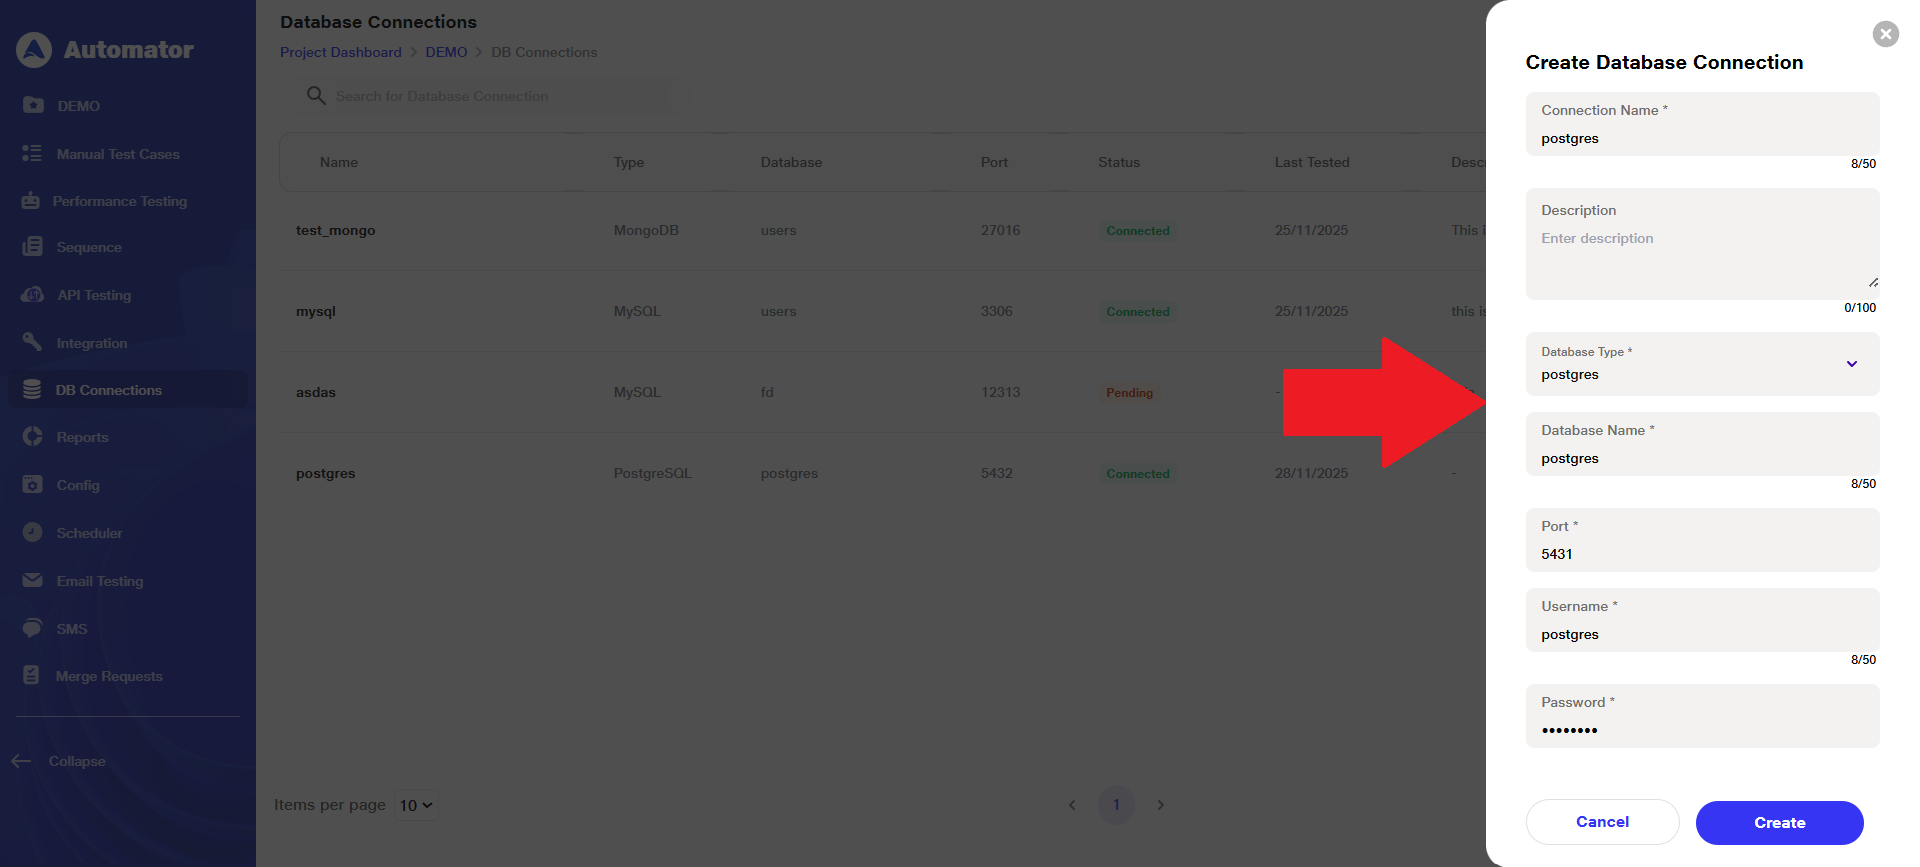
e) Click on the Create button at the bottom of the form to proceed with creating the connection.
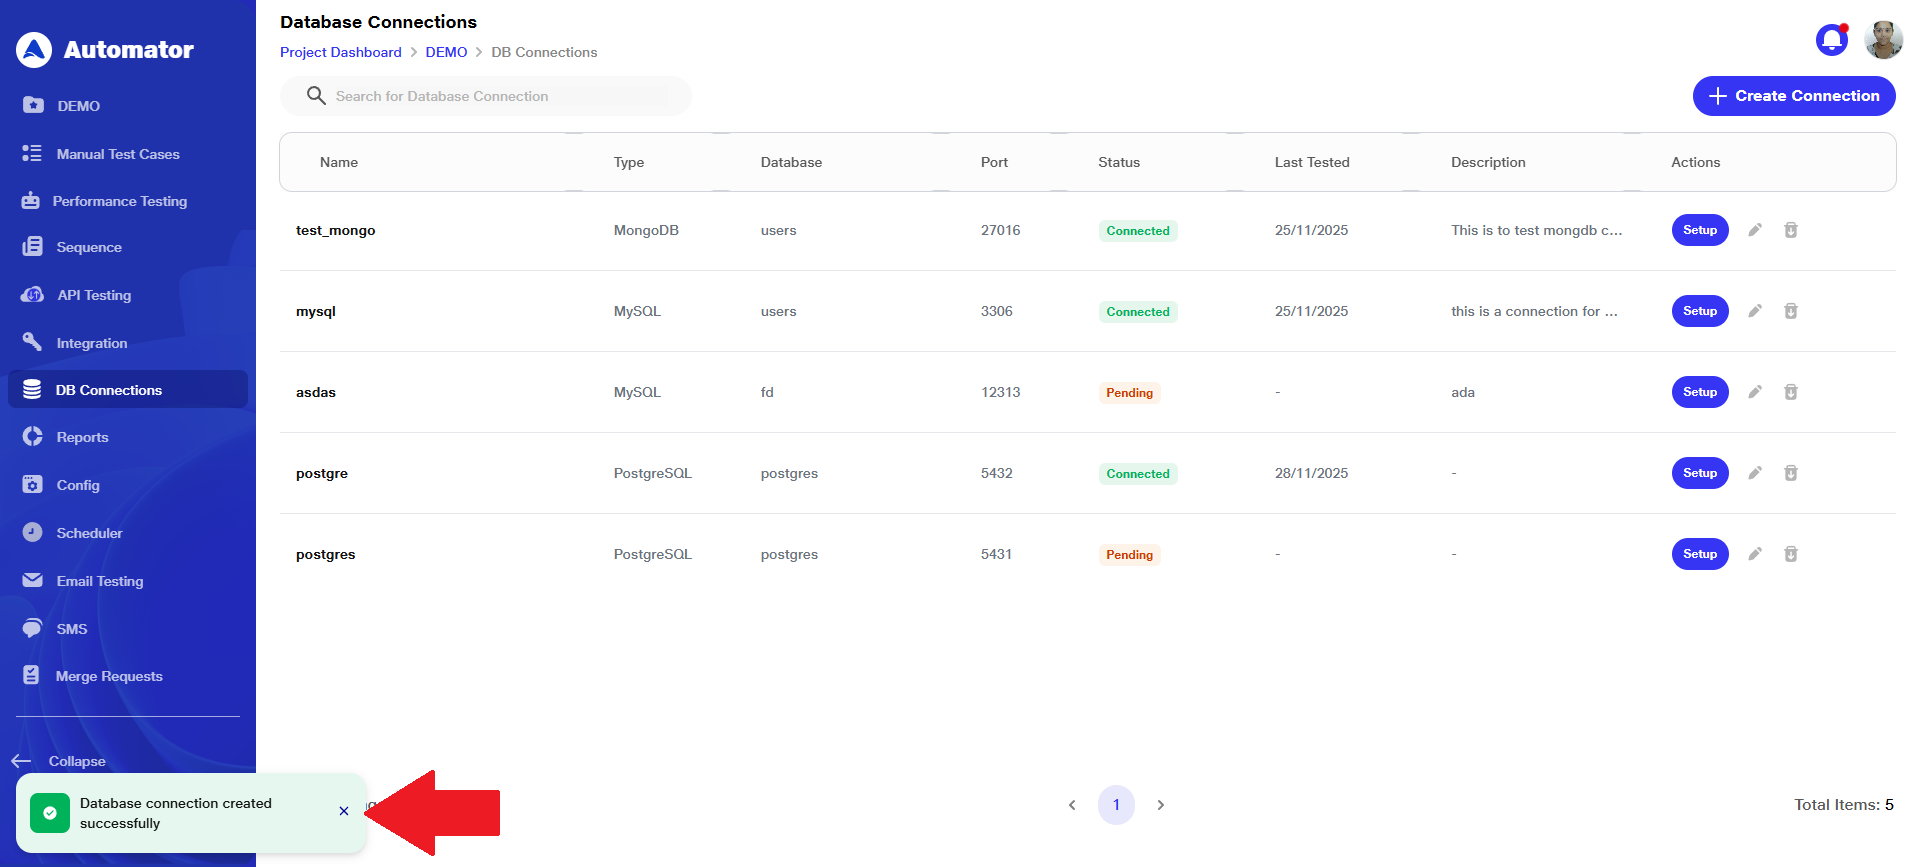
 f) The user will get a Database connection created successfully popup in the bottom-left corner upon successful creation.
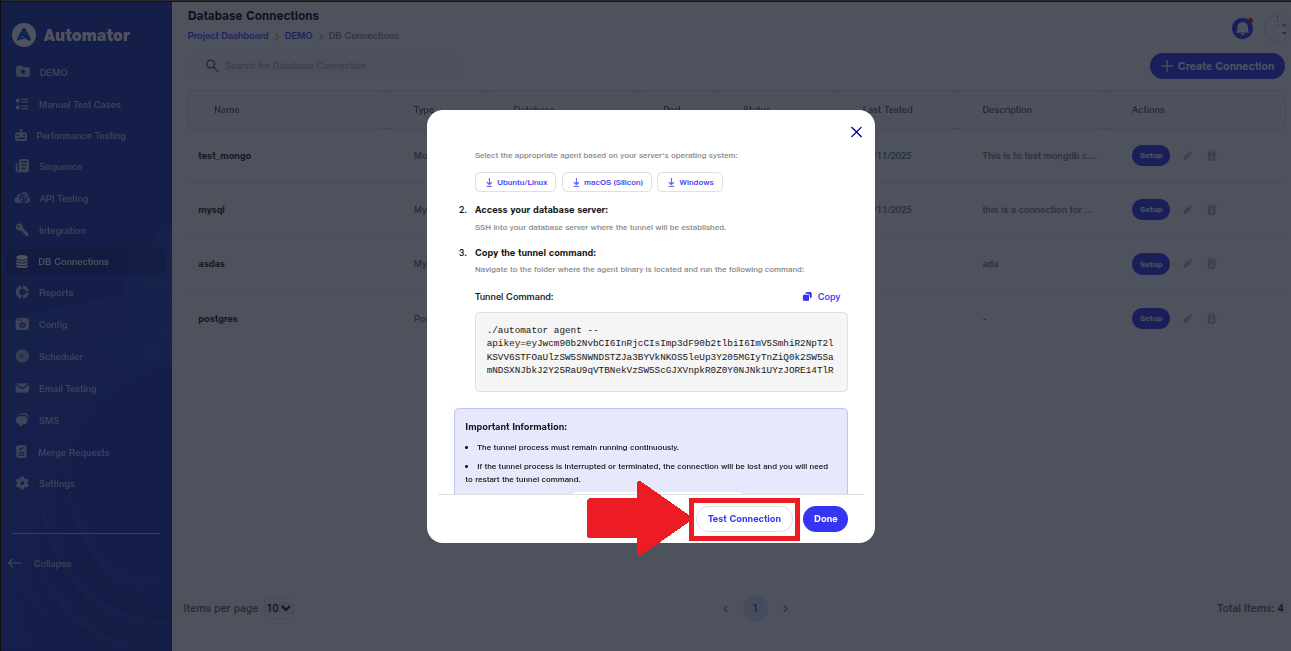
3) Setting Up Secure Tunnel
a) Once a connection is created, the user will see the Setup button with the status shown as Pending, indicating that the secure tunnel connection to the database server is yet to be completed.
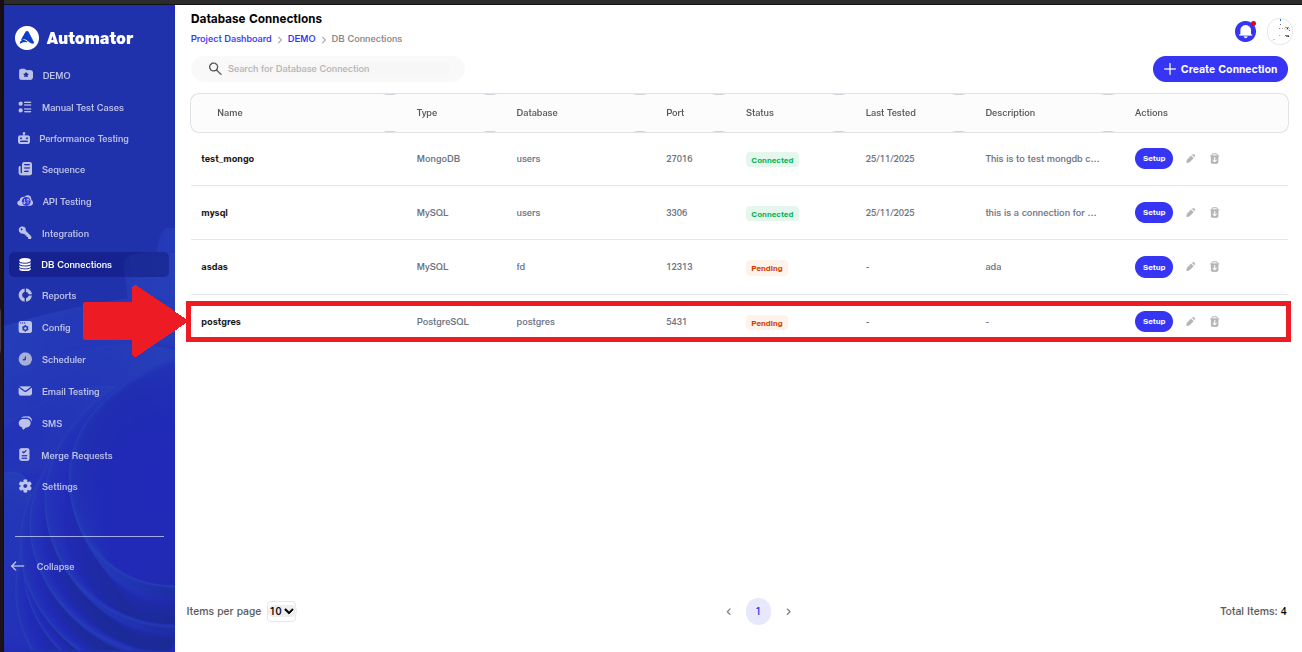 b) Click the Setup button.
c) The setup page will provide instructions on:
i) How to download the agent when the database is locally hosted.
ii) How to establish a connection with the selected database.
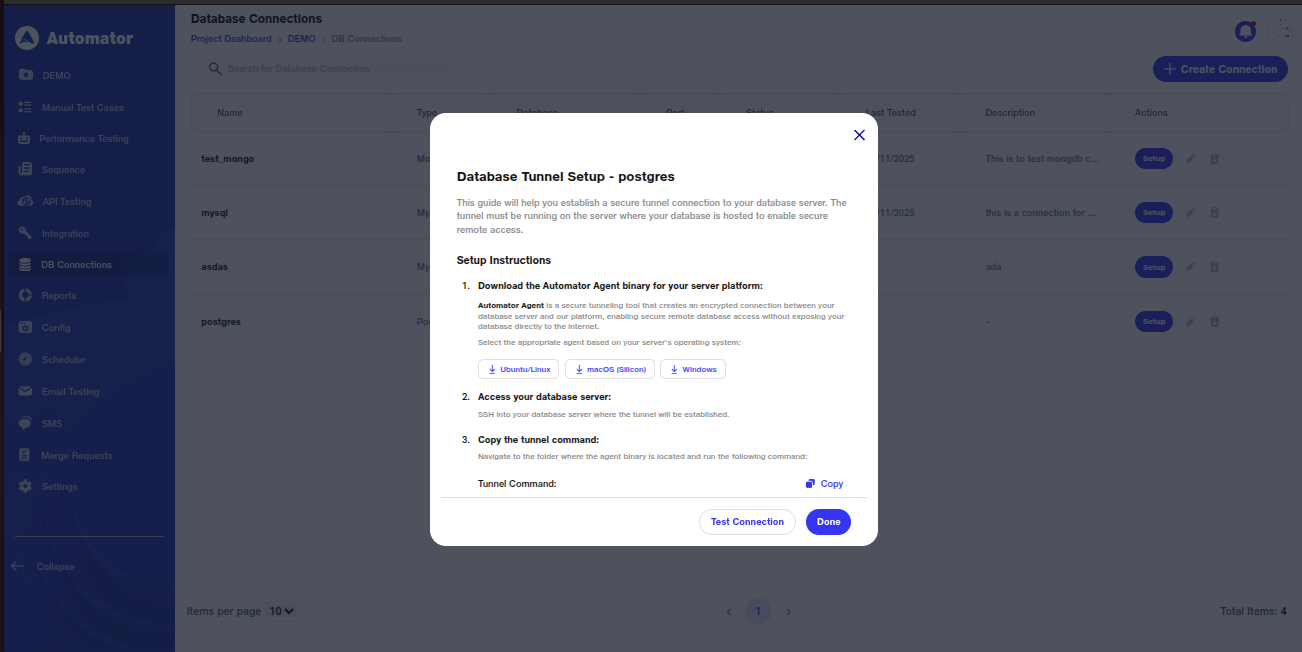 d) Determine your database server’s operating system (Windows, Linux, or macOS) and select the corresponding Automator Agent binary from the setup page. Download the file to a known location on your server.
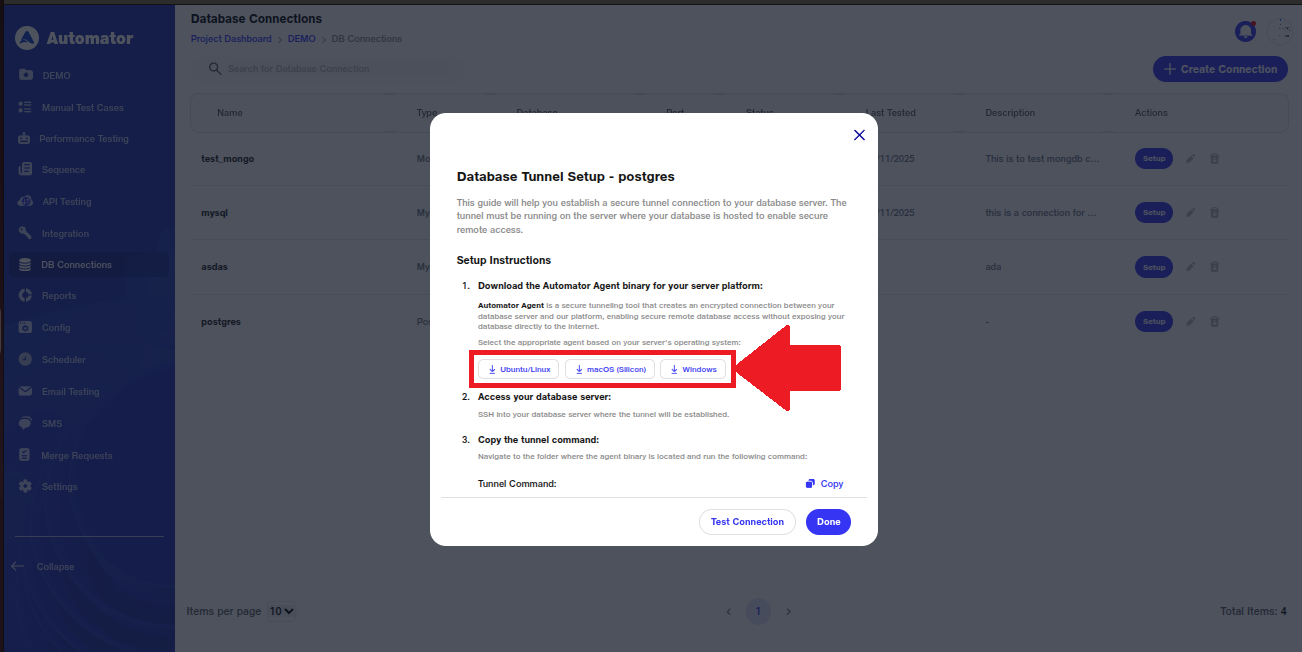 e) Please Note: The Automator Agent creates a secure, encrypted tunnel between your database server and the platform, enabling safe remote database access without exposing your database directly to the internet.
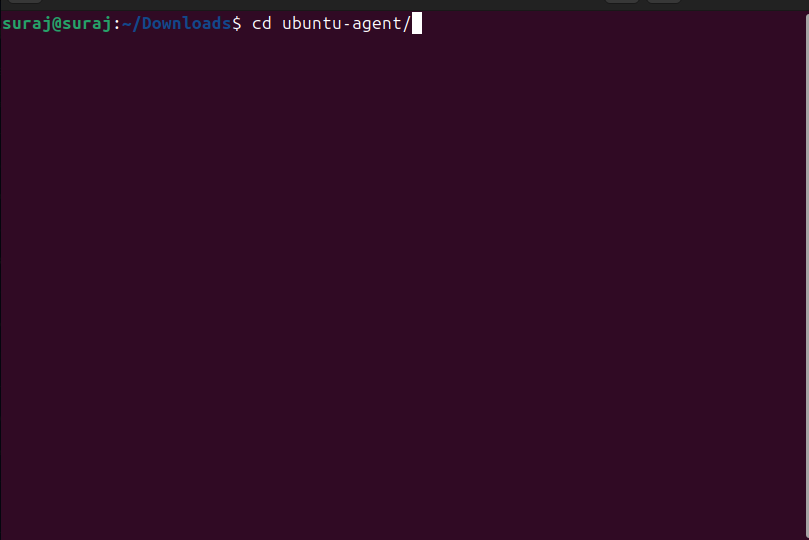
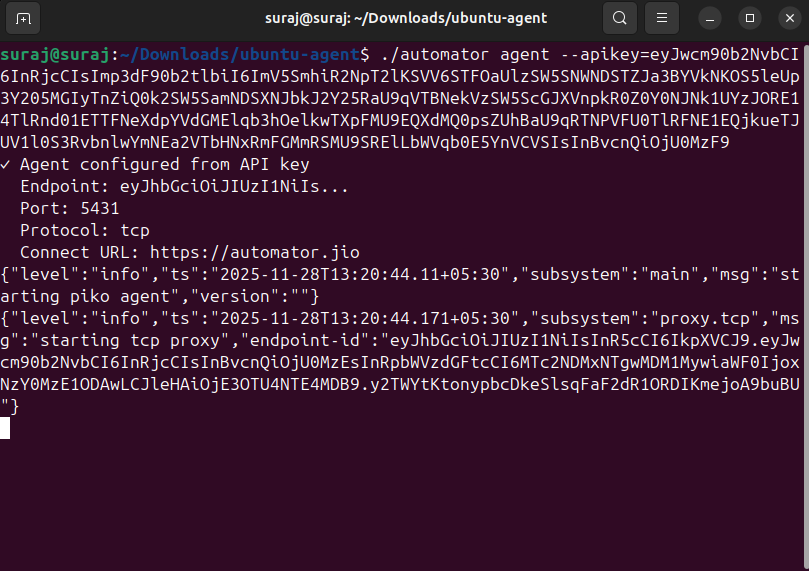
f) After downloading the Automator Agent zip file, unzip it through a command prompt. For example, on Ubuntu, you can use standard unzip commands to extract the files.
 g) After unzipping the Automator Agent, navigate to the folder containing the agent binary.
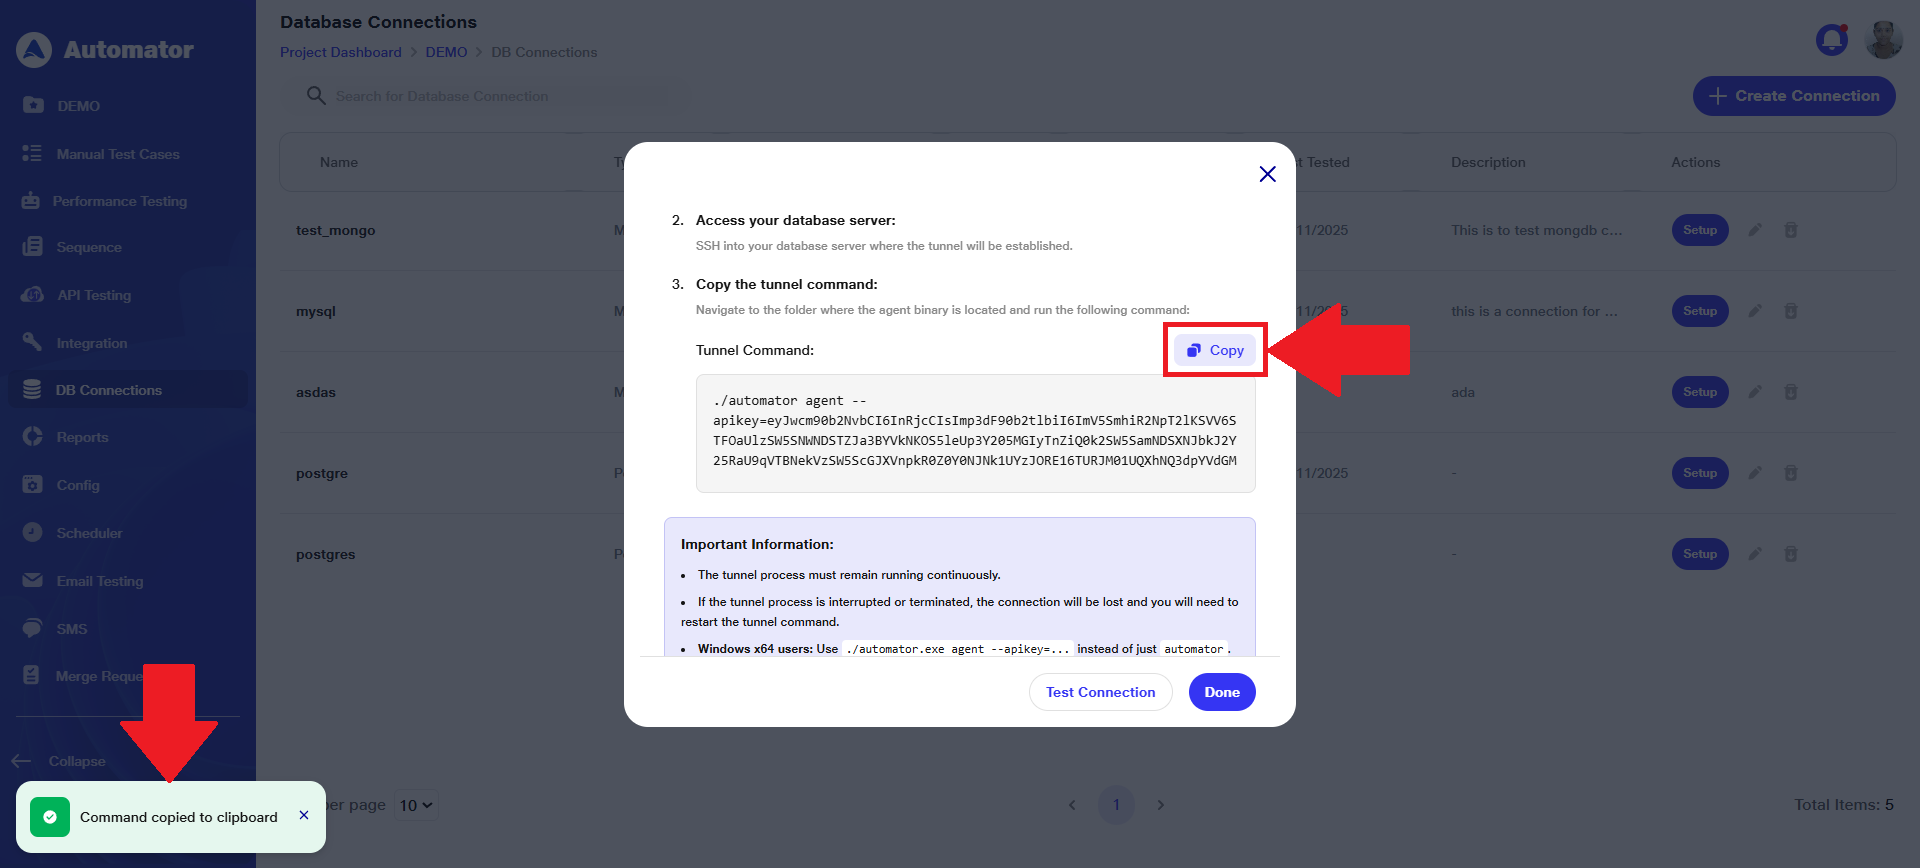
 h) Copy the provided tunnel command from the setup page.
 i) Run the command within the agent binary to establish the secure connection.
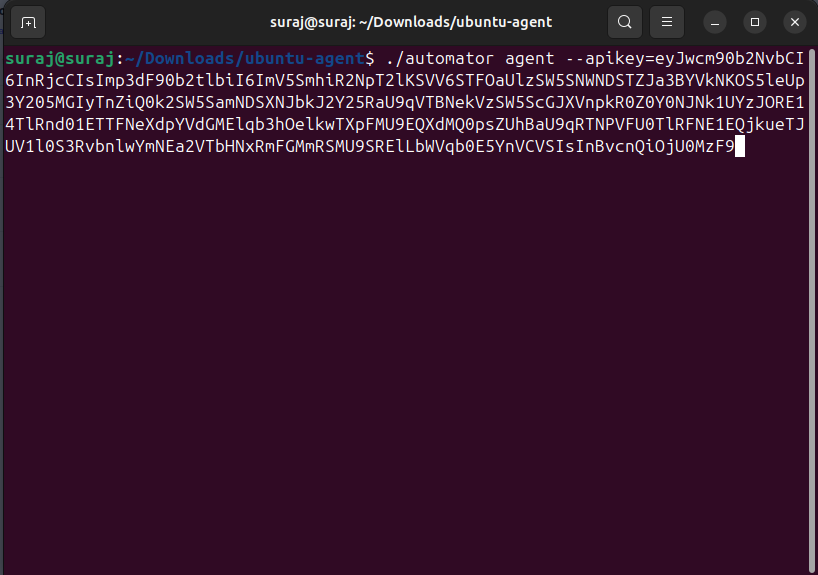 j) Once the command is executed, the secure connection will be established.
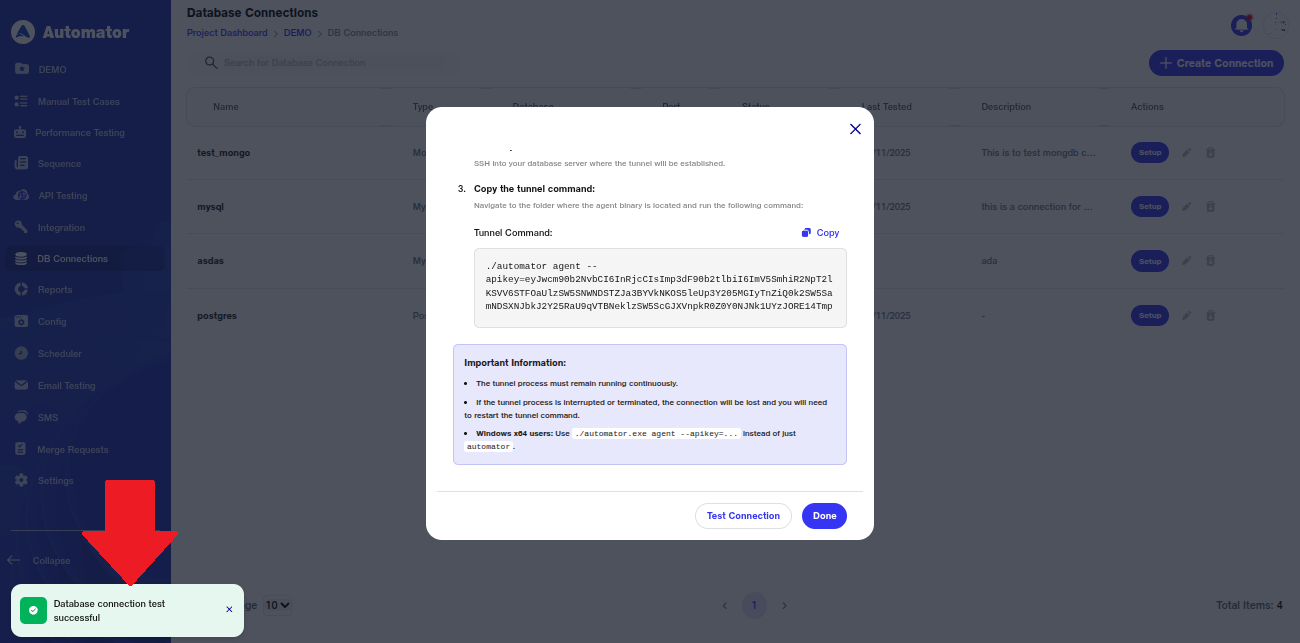
 k) Once the connection is established, the user can click on Test Connection to verify whether the database connection is running properly.
 l) On successful connection, a popup will appear in the bottom-left corner stating, Database connection test successful.
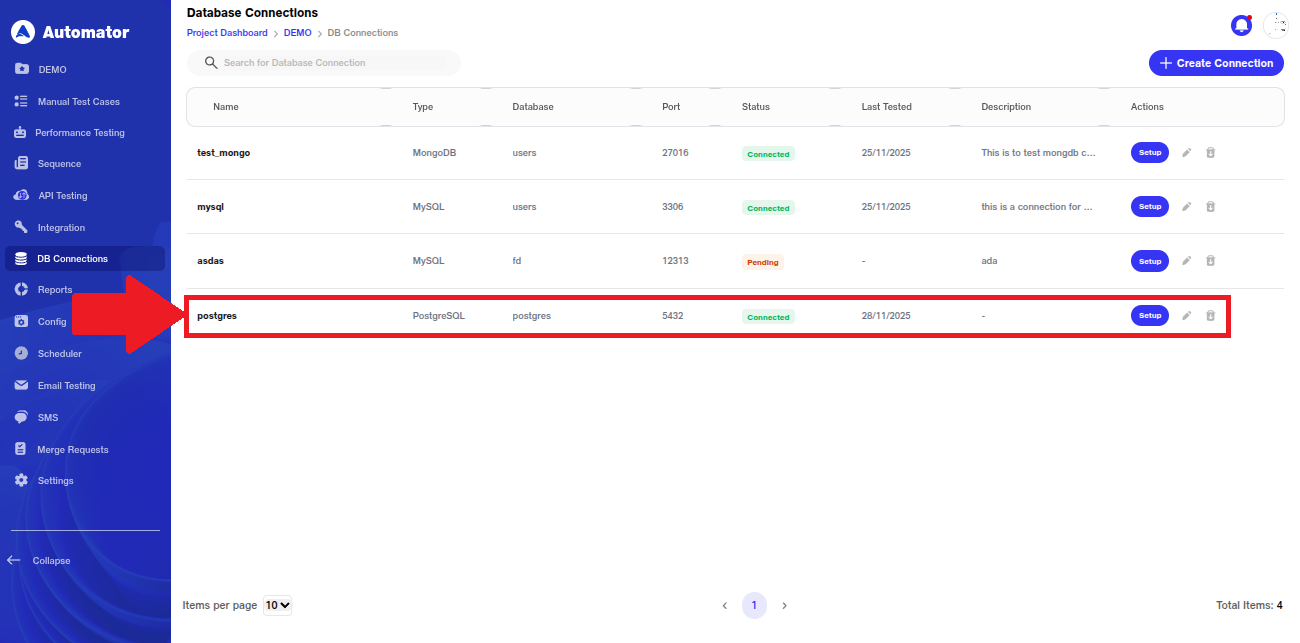
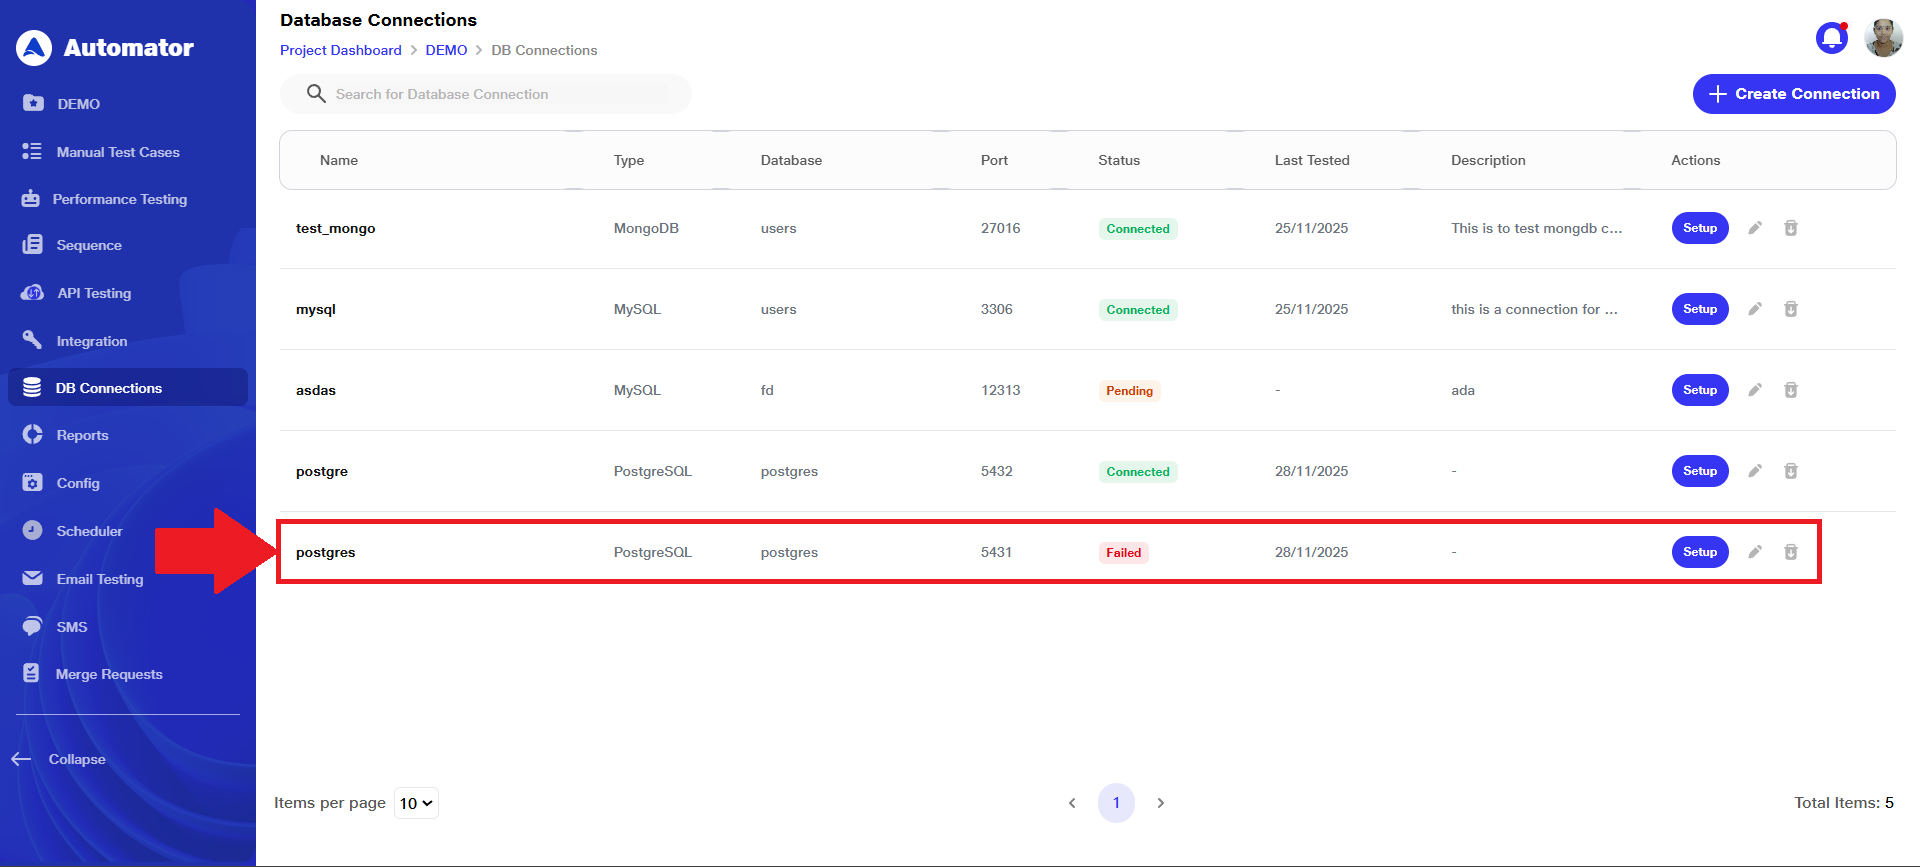
 m) Now, on successful connection, the status will also be displayed as Connected.
4) Handling Connection on Query Failure
a) If the test connection or query execution fails, the user will see a popup in the bottom-left corner stating as shown below
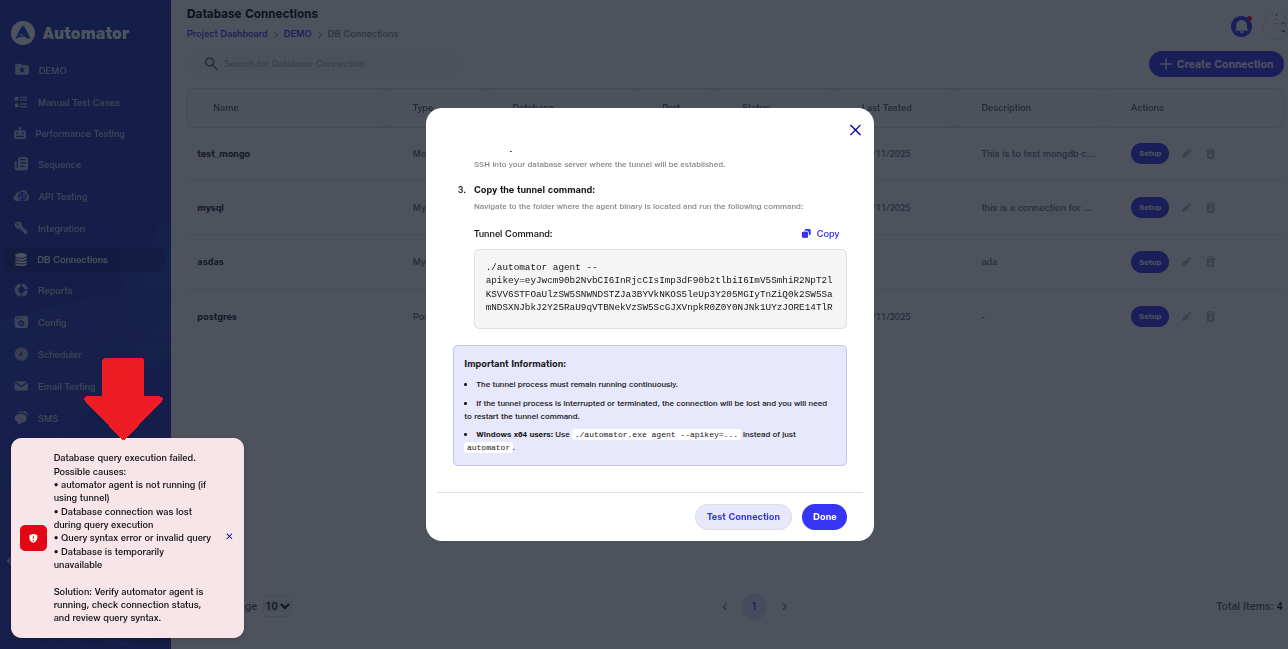 b) The user should review these possible causes and follow the suggested steps (Setting Up Secure Tunnel) properly to resolve the issue before attempting the connection or query again.
c) Also, on failure of connection, the status will also be displayed as Failed.
5) Editing & Deleting Database Connection
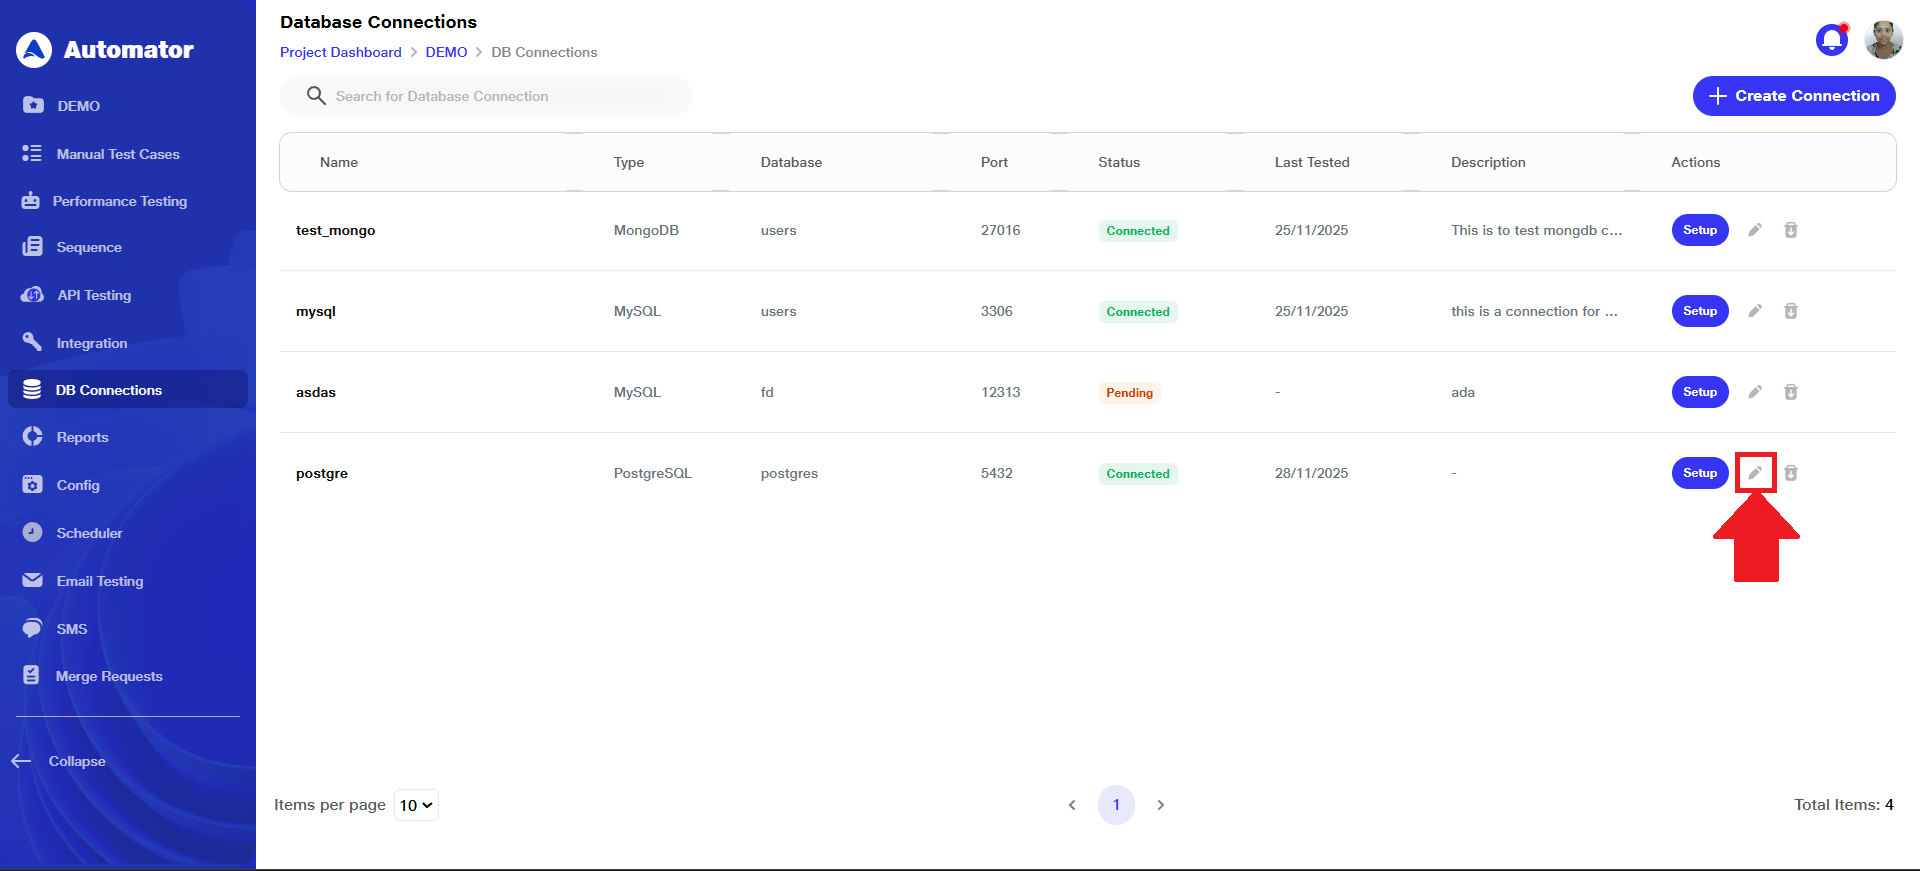
a) To modify the database connection, click the Edit button associated with that connection entry.
 b) Make the required changes and click the Update button to save your modifications.
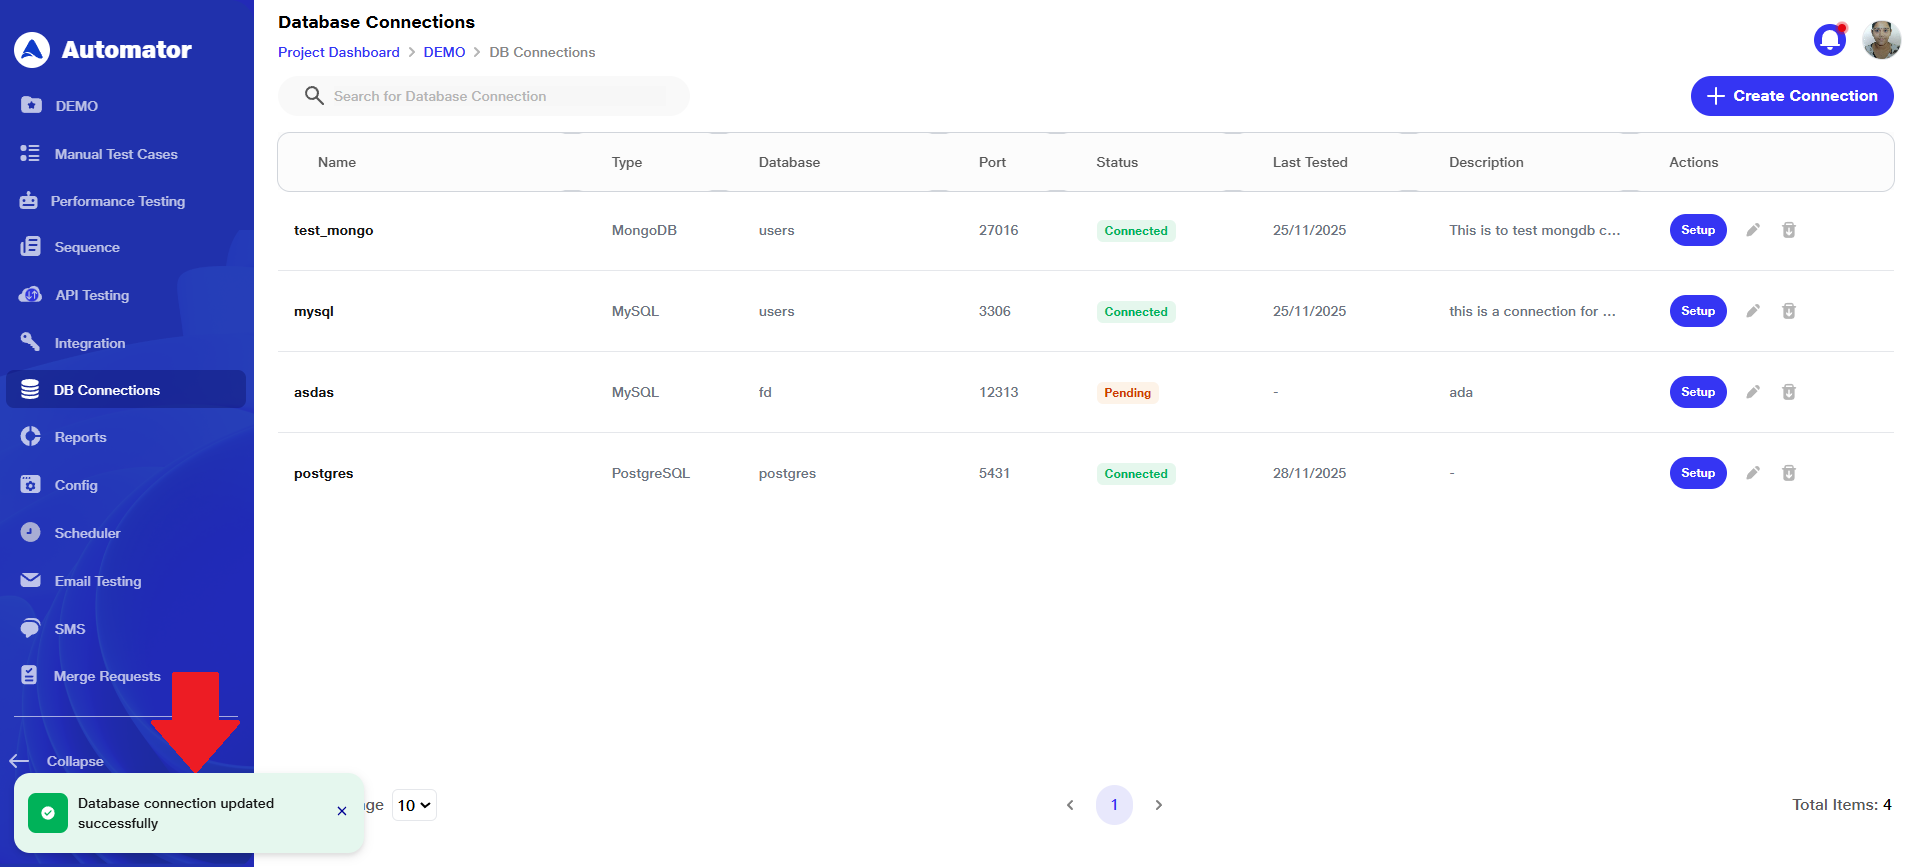
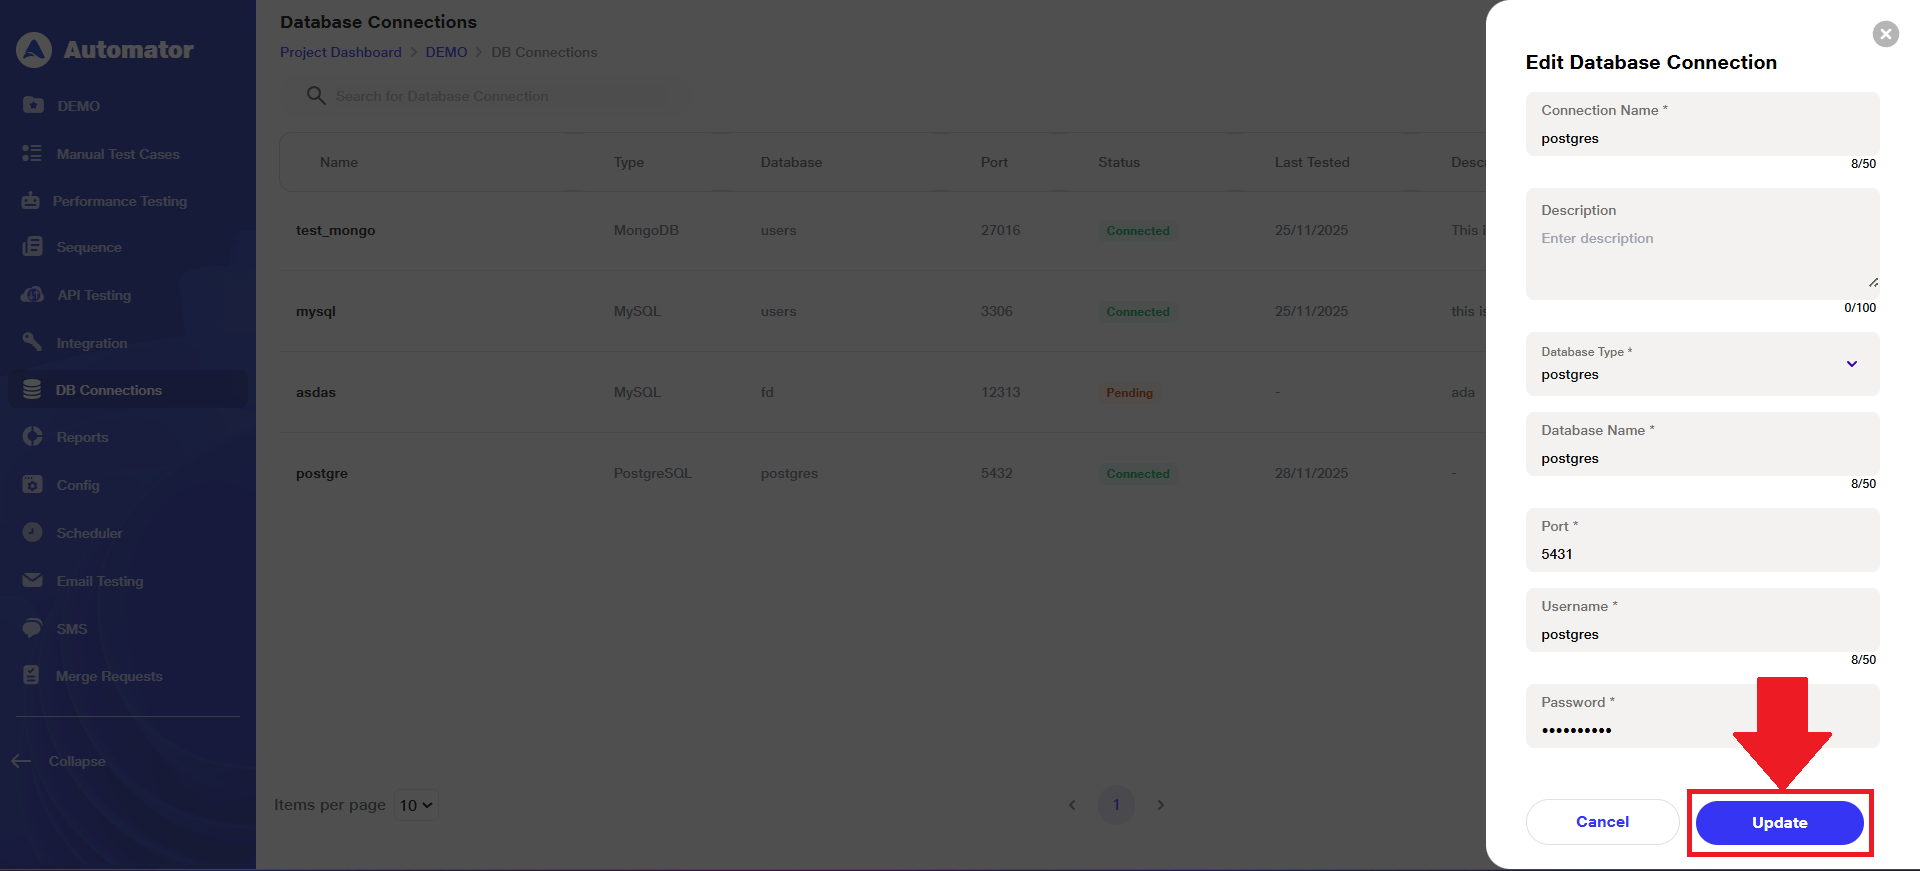 c) A Database connection updated successfully popup in the bottom-left corner confirms that the update was completed successfully.
 d) If the user wants to delete a database connection, they can click the Delete button associated with that connection entry.
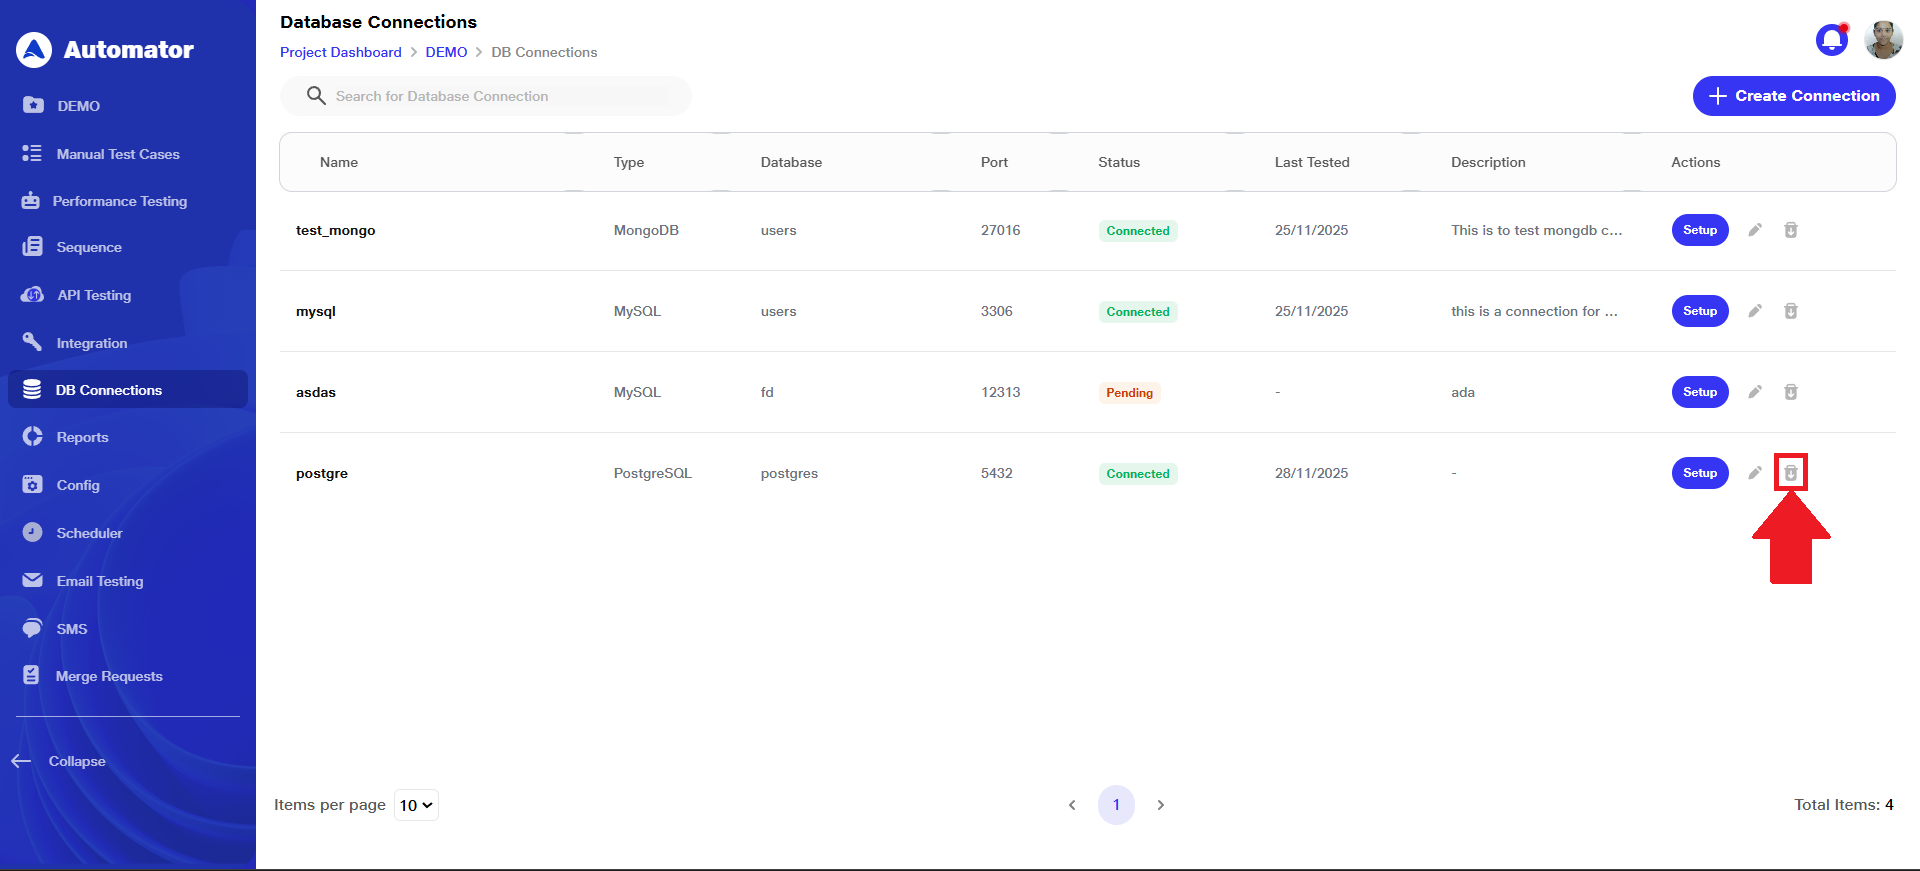 e) Confirm the action to complete the deletion.
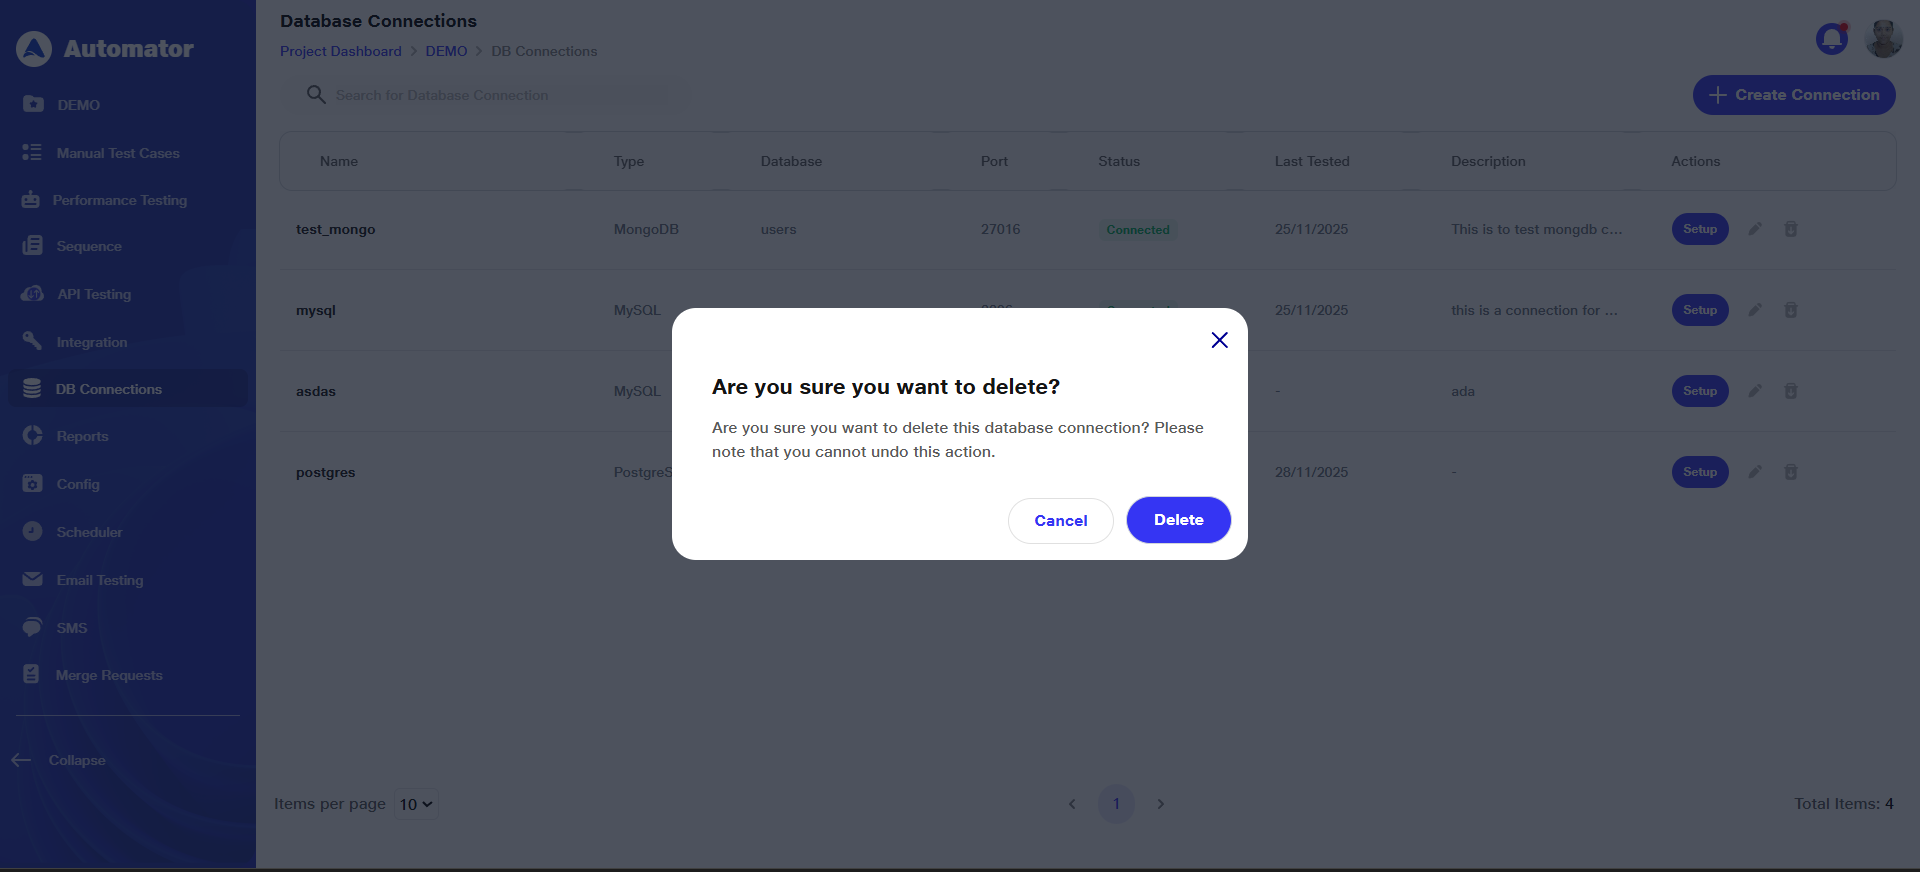 f) A Database connection deleted successfully popup in the bottom-left corner confirms that the deletion was done successfully.

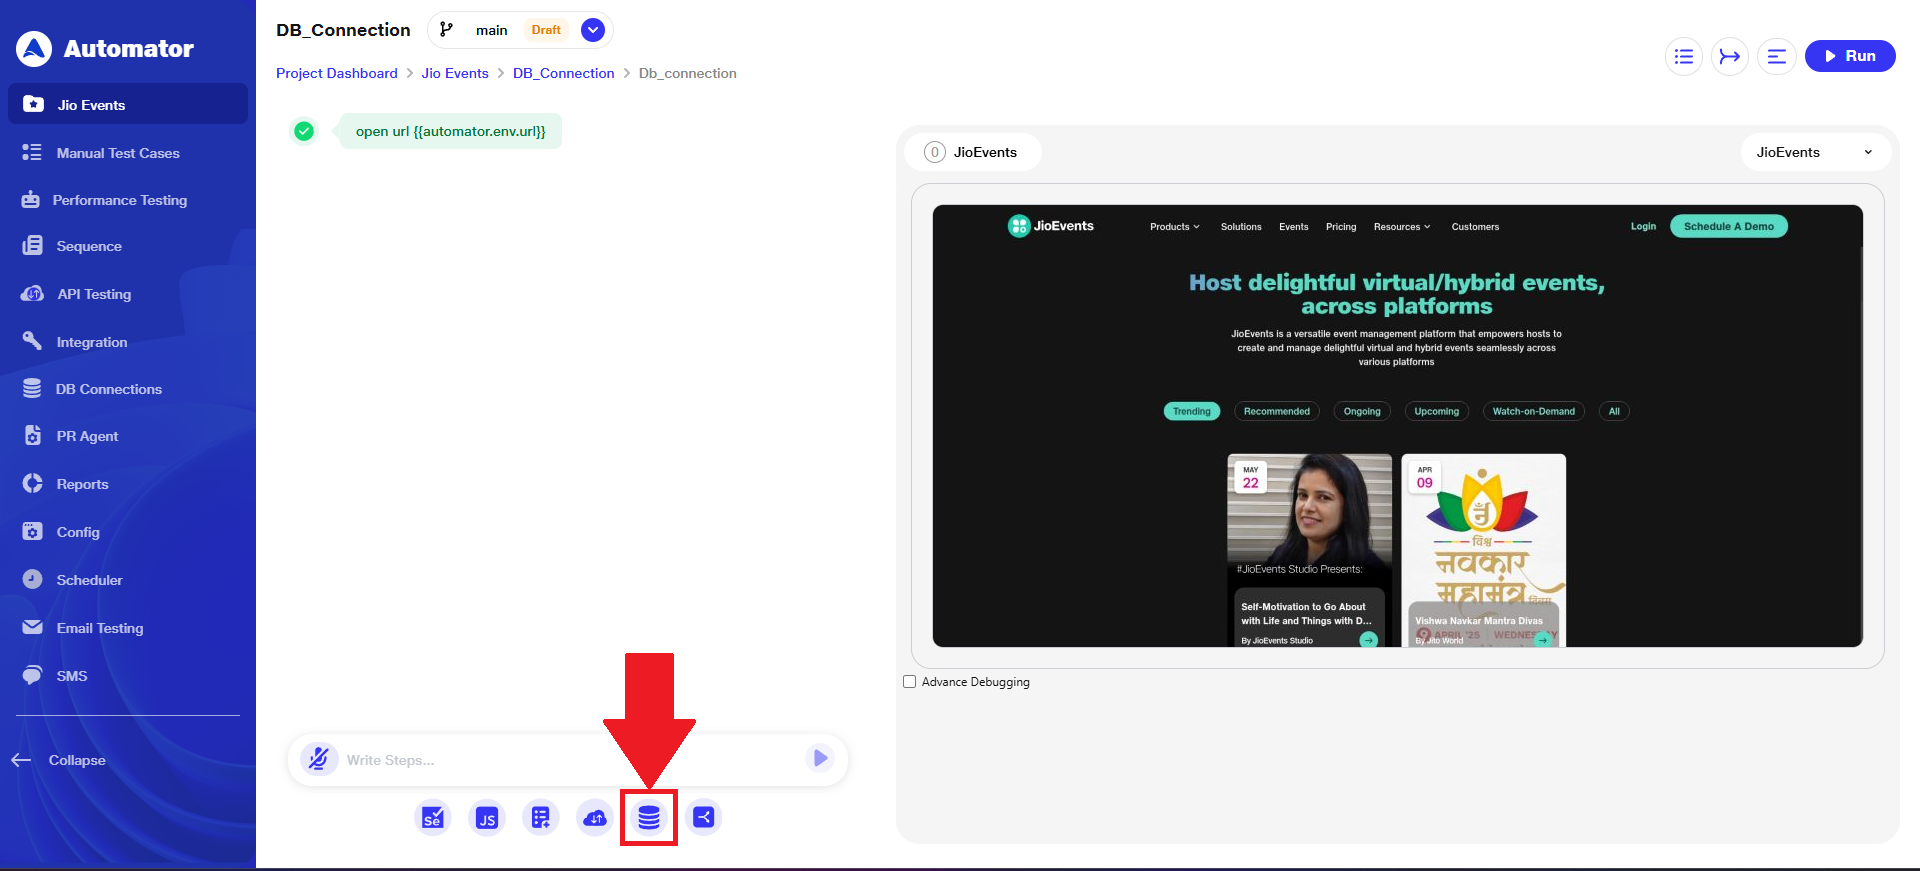
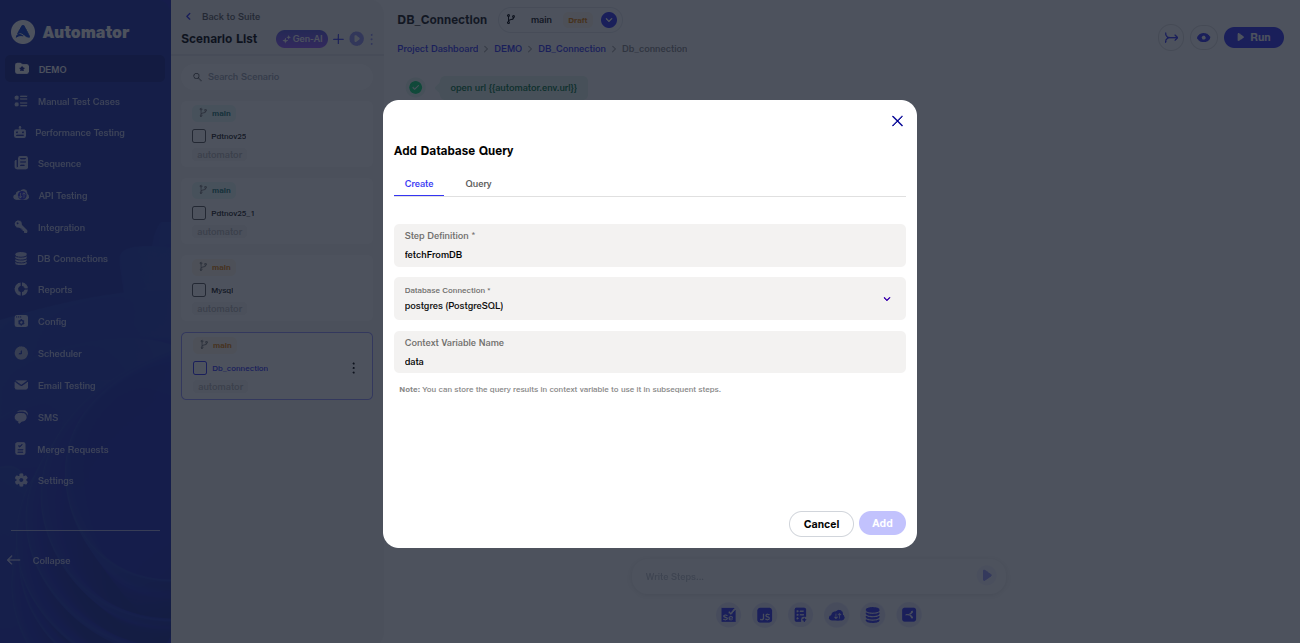
6) Database Query Configuration
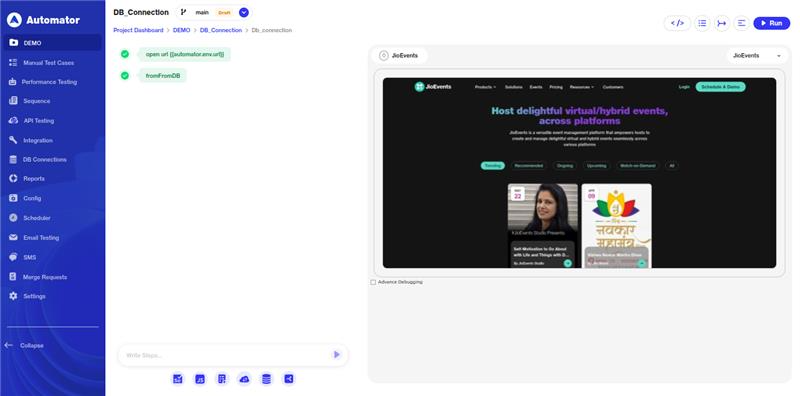
a) Within the same project, under the Scenario section, the user can locate the Database Query icon.
 b) Upon clicking it, the user will be required to complete the mandatory fields: Step Definition and Database Connection, while the Context Variable Name field is optional.
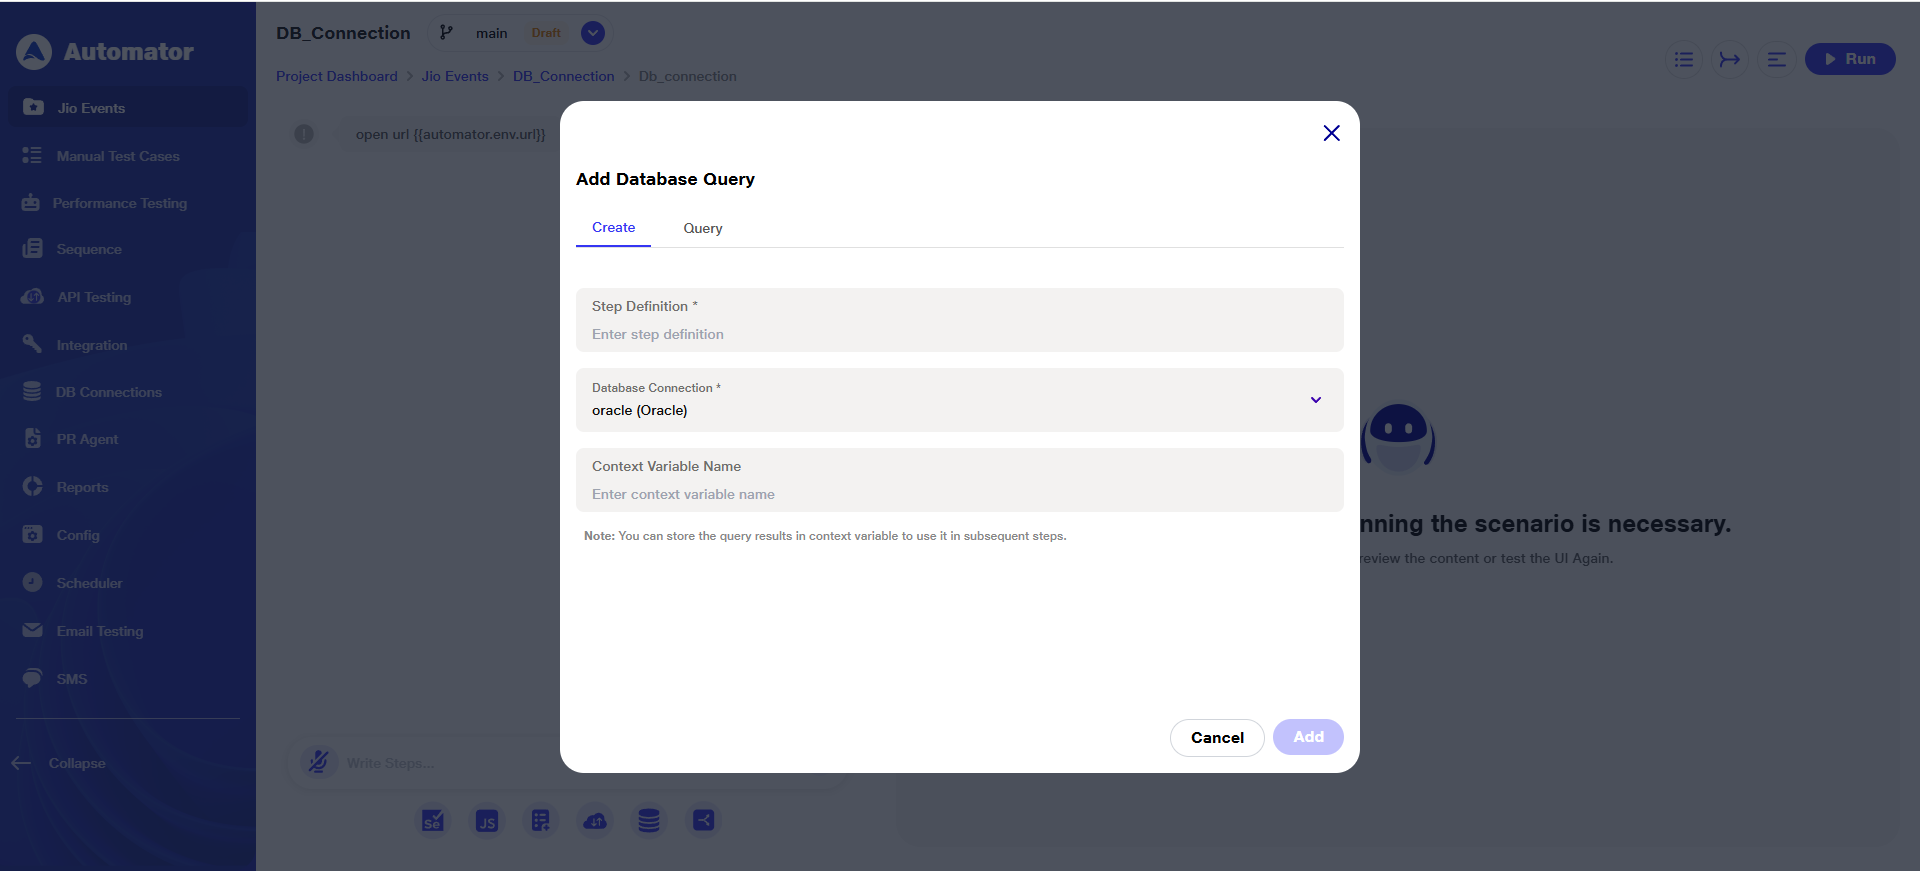 c) The user should complete the fields accurately.
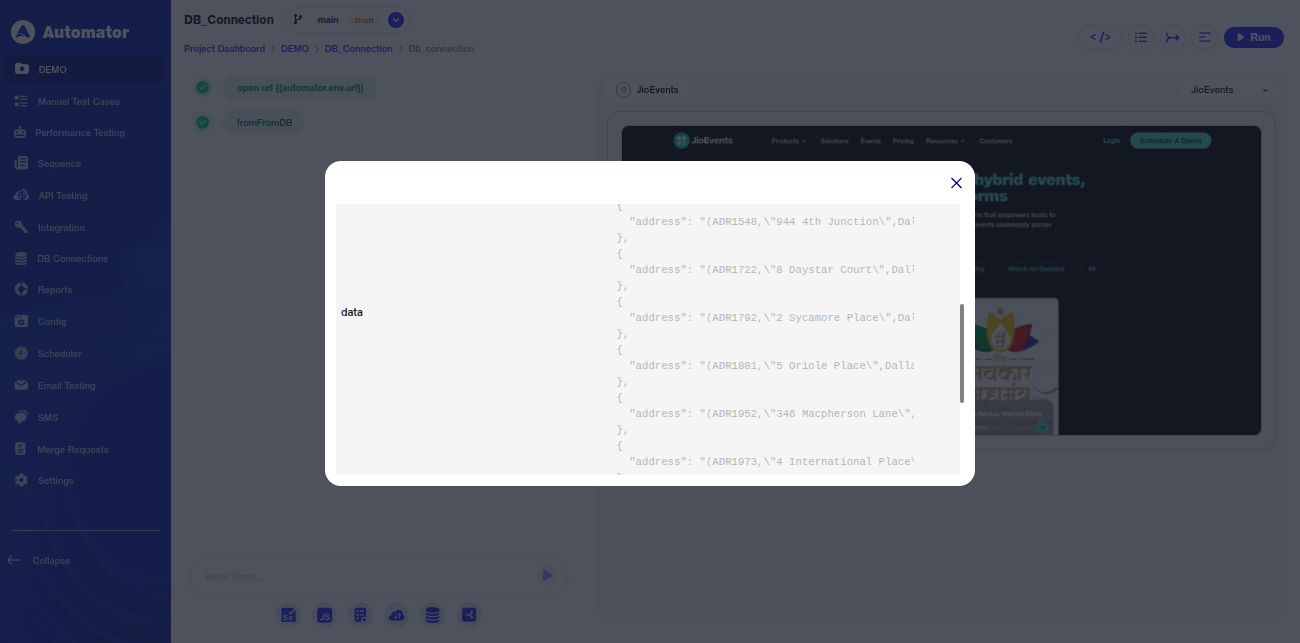
d) The Context Variable is used to store the query results, so they can be referenced in subsequent steps.
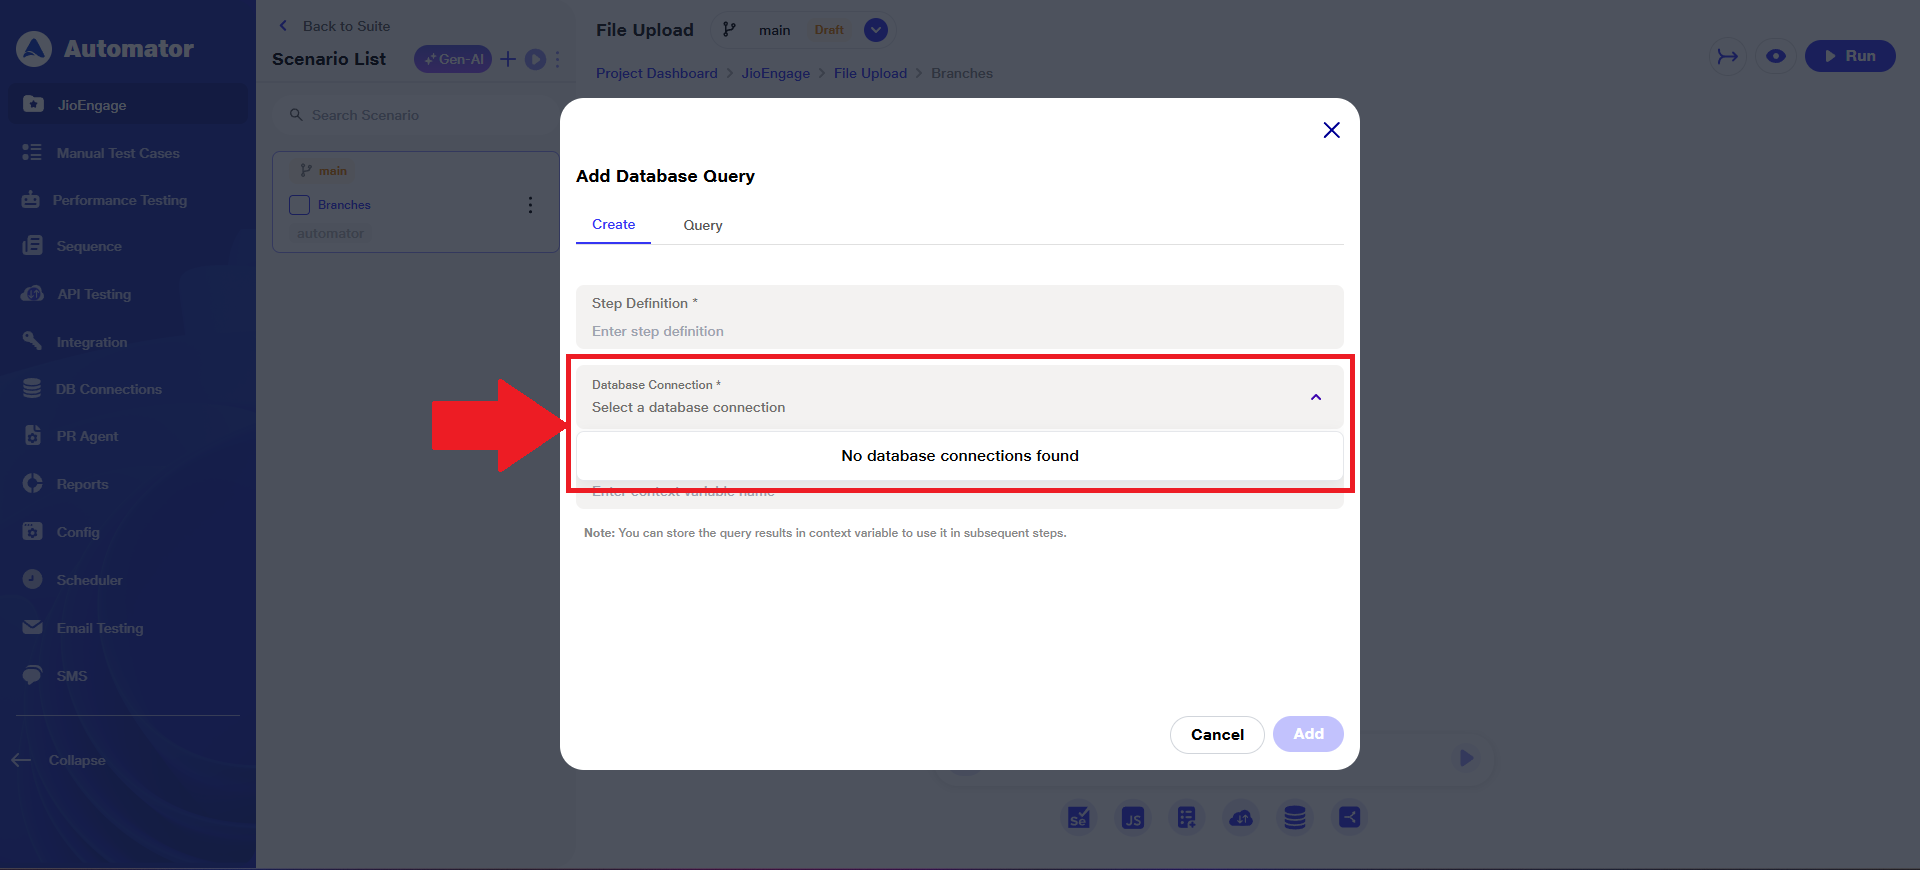
 e) Please Note: If no database is configured or connected, the dropdown will display the message: No database connections found.
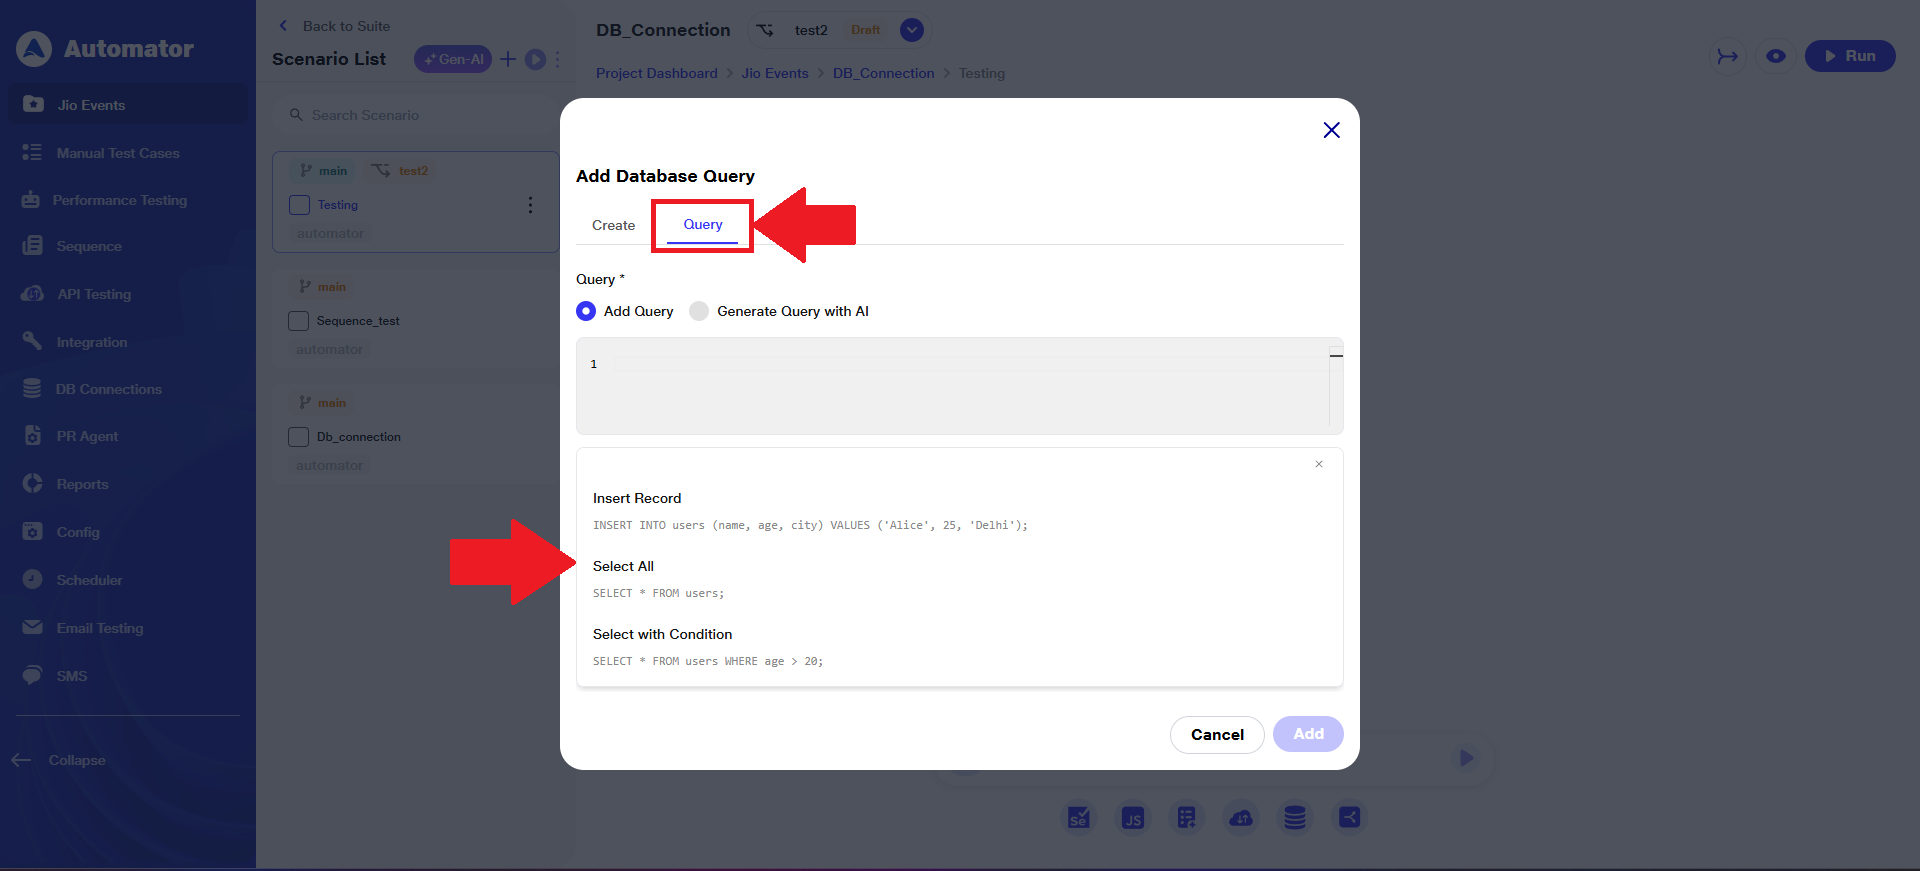
 f) The Query field is mandatory. The user can either type the query manually or generate it using the AI option.
g) When the user clicks on the Query field, a list of predefined queries—based on the selected database type—will appear.
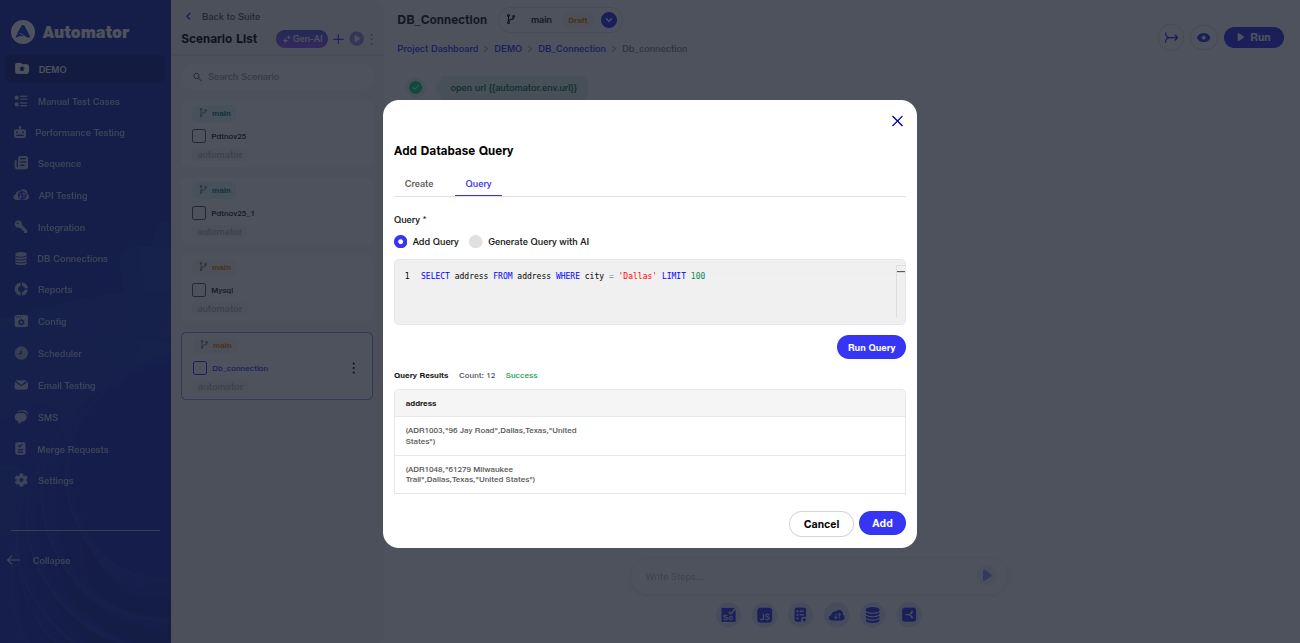
 h) The user can run any selected query and view its results.
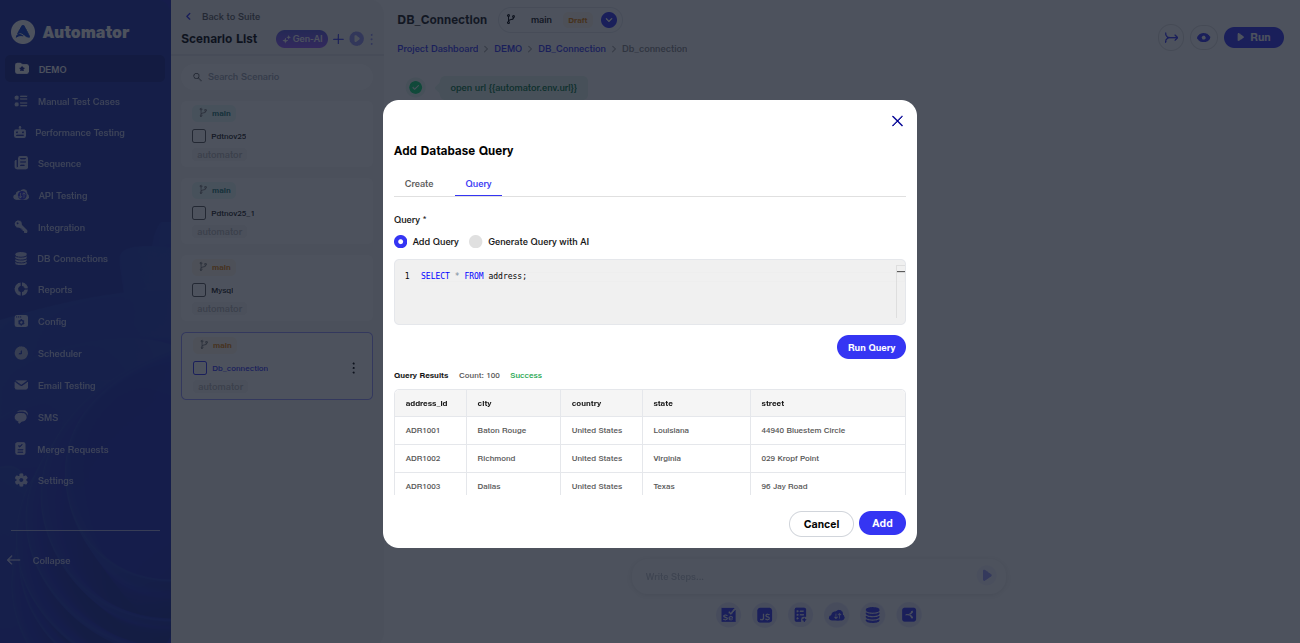 i) Please Note: Any queries that may alter the database are prohibited.
j) If the user is unable to write a query manually, they can use the Generate Query with AI option. By entering a prompt in plain language and clicking Generate, the system will produce a Generated Query that can be used in the Query field.
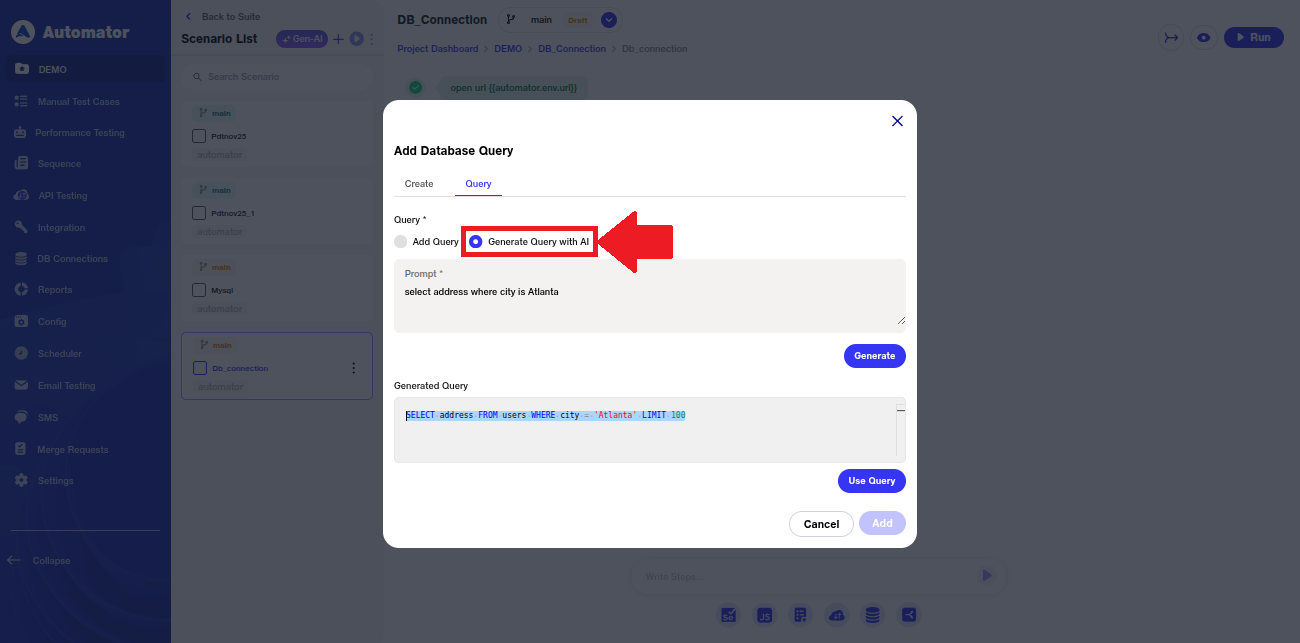 k)To use the AI-generated query, the user can click Use Query. This action inserts the generated query directly into the Add Query field.
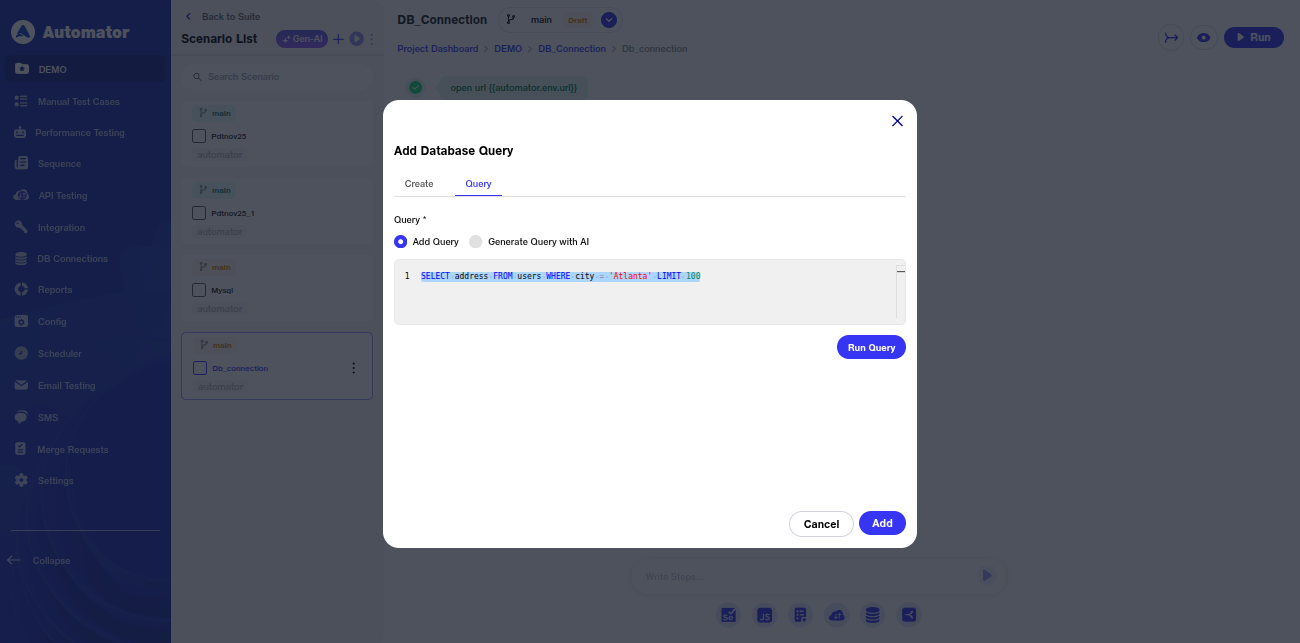 l) As previously noted, the Run Query action executes the query and returns the corresponding results.
 m) After adding the desired steps, the scenario can be executed.
n) The defined queries will run on the connected database, and the corresponding database responses will be returned.
 o) Please Note: Live previews are not available for DB steps.
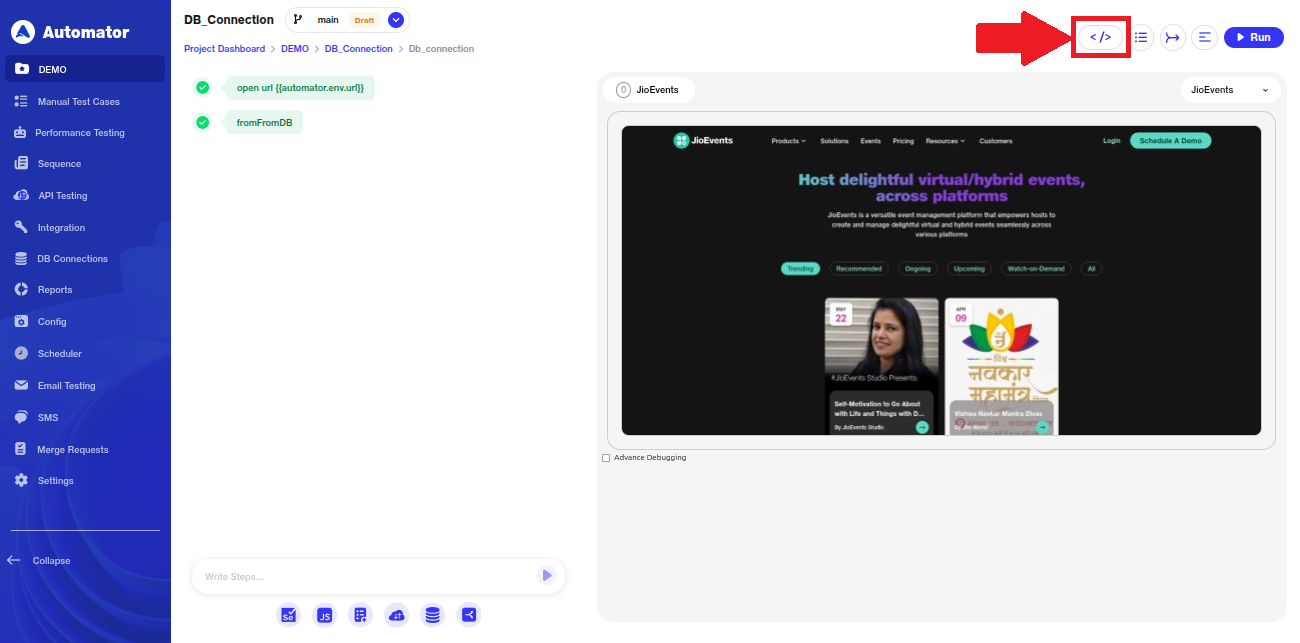
p)To review the stored database response, the user can click on the Context Variable.
7) Reports: Database Query Overview
a) When users navigate to Reports > Run > Suites > Scenario, they can review each database step along with the responses retrieved from the connected database.

Benefits
1) Feature Access & Visibility (Flag-Based Enablement) – Provides controlled, switch-based activation that ensures DB testing features are visible only when enabled, preventing clutter and maintaining a clean user workspace.
2) Role-Based Permissions – Strengthens platform governance by allowing only Admins/ Project Leads to manage DB connections while restricting others to safe, view-only and test-only actions, ensuring secure and compliant database handling.
3) DB Connection Management – Enables structured creation and storage of DB configurations—ensuring consistent, reusable, and error-free setup across MySQL, PostgreSQL, MongoDB, and OracleDB.
4) Guided Setup & Agent Instructions – Improves onboarding and reduces configuration errors through clear instructions for connecting locally hosted or cloud-hosted databases via the setup and agent download process.
5) Connection Verification (Test Connection) – Ensures reliability and reduces execution failures by allowing users to validate database connectivity before running DB-driven test scenarios.
6) DB Query Execution in Scenarios – Empowers users to build robust database-level validation steps by selecting DB connections, writing or AI-generating queries, and running predefined queries tailored to each DB type.
7) Query Result Handling & Variable Creation – Supports dynamic data-driven testing by allowing users to capture query outputs and store them as variables for use within the same scenario.
8) Consistent Execution of DB Steps – Ensures accurate backend validation by executing user-defined queries on the configured databases and retrieving structured responses during scenario execution.
9) Reporting & Response Visibility – Enhances debugging and auditability by displaying each executed DB step along with the captured database response in the Reports section.